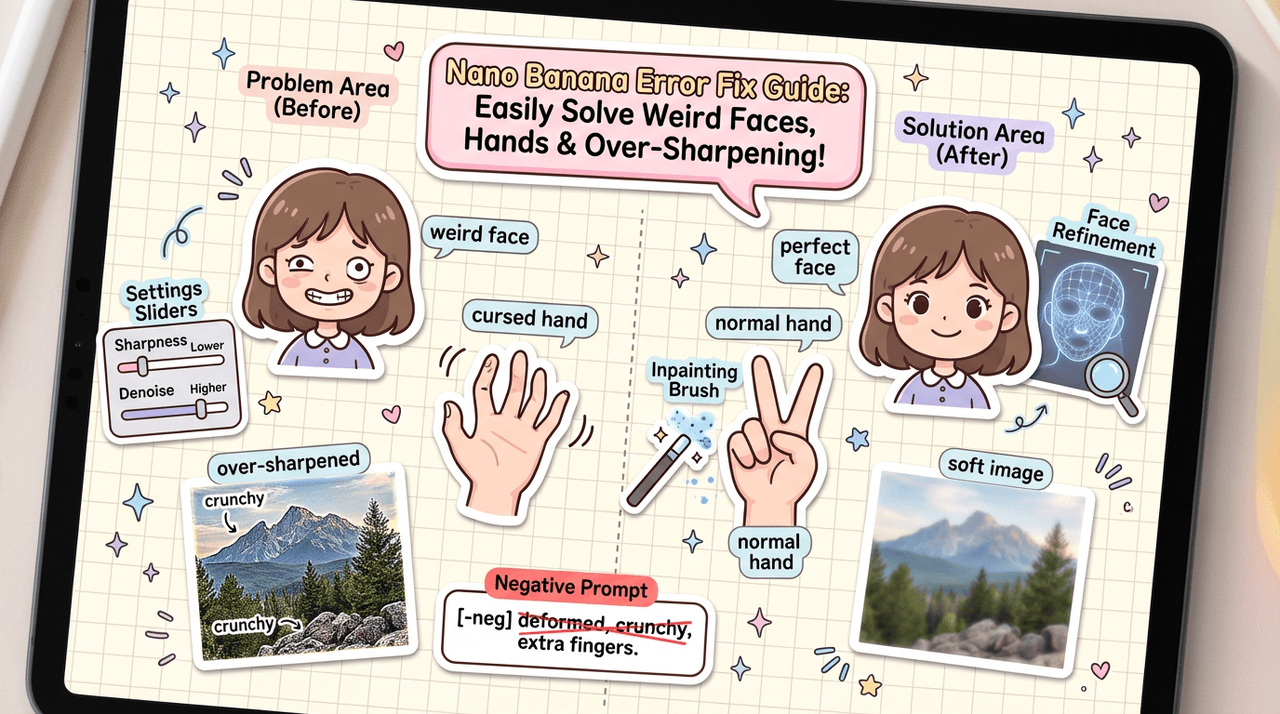
If you're seeing crunchy textures, warped faces, or cursed-looking hands in your Nano Banana renders, you're not alone. I've been there, trying to hit a client deadline while fighting weird artifacts instead of focusing on the actual concept.
In this guide, I'll walk you through the most common Nano Banana errors I run into and the exact settings and workflows I use to fix them. By the end, you'll have a repeatable way to get clean, photorealistic images (including readable text) without spending hours troubleshooting.
AI tools evolve rapidly. Features described here are accurate as of December 2025.
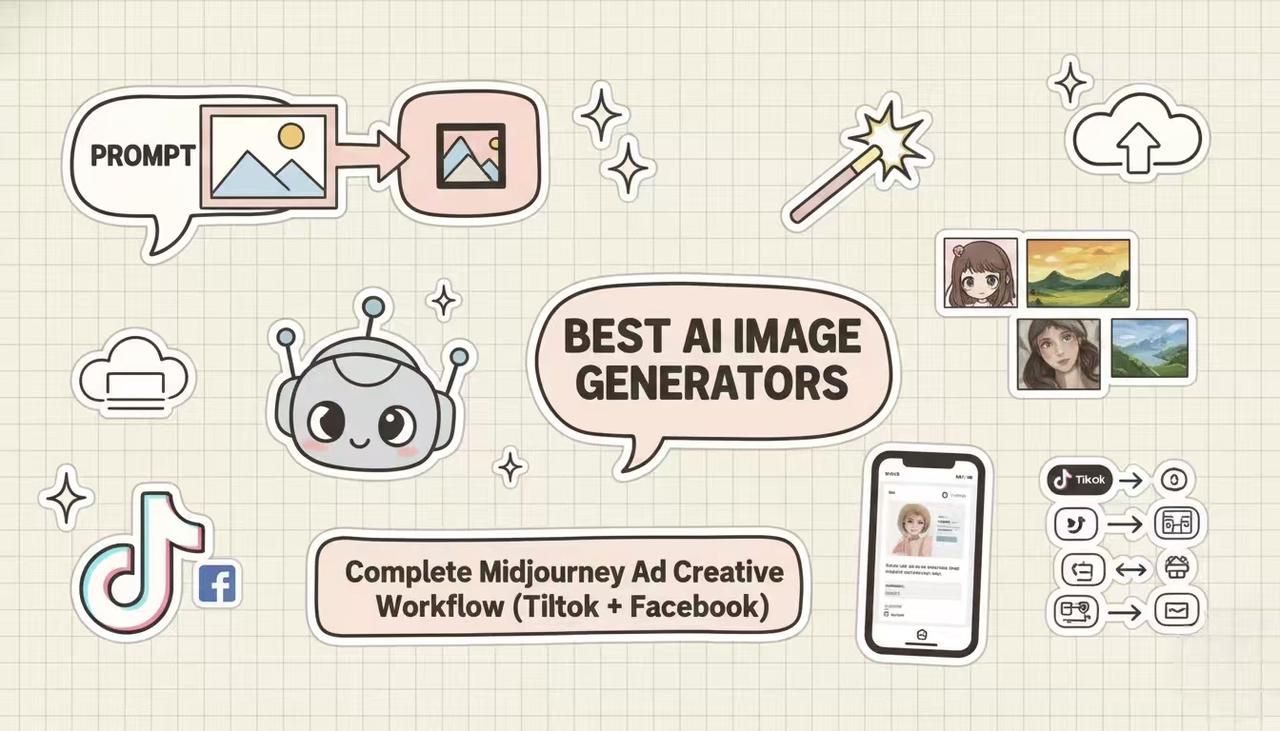
Understanding Nano Banana Errors: Common Causes and Solutions
Nano Banana is powerful, but it's also sensitive. Small changes in prompts, sharpness, or sampler settings can swing results from "wow" to "why?" in a single render.
Typical Nano Banana error patterns
The most frequent issues I see are:
-
Over-sharpened, crispy-looking images
-
Subtle face distortions (eyes drifting, teeth melting, odd symmetry)
-
Broken or extra fingers and twisted wrists
-
Haloing or ghost artifacts around text
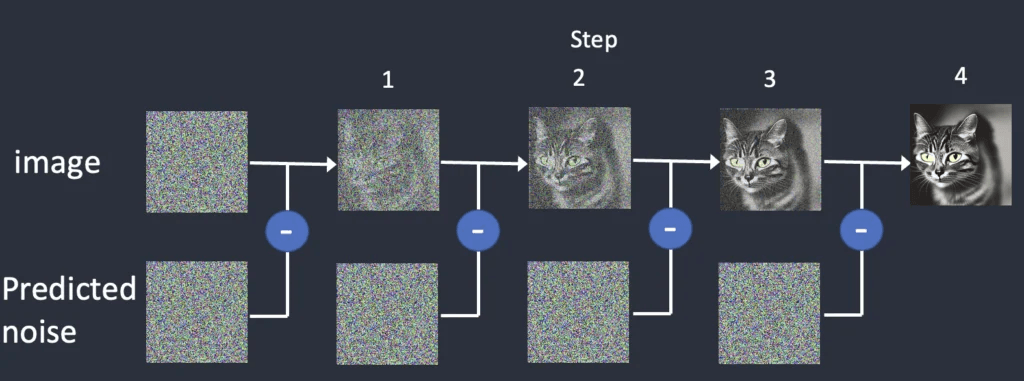
Under the hood, these usually come from three things:
-
Aggressive enhancement settings (sharpness, clarity, or detail boosters stacked together)
-
Too many passes or upscales, which re-interpret the image over and over
-
Vague or conflicting prompts that confuse the model about anatomy or perspective
Before you jump into each specific problem, I recommend a basic troubleshooting routine:
-
Check your base model and style preset. Some photo presets are inherently punchier and more contrasty.
-
Reset to defaults, then only change 1–2 parameters at a time.
-
Save reference renders as you go so you can compare what each change does.
Fixing Over-Sharpening Issues in Nano Banana
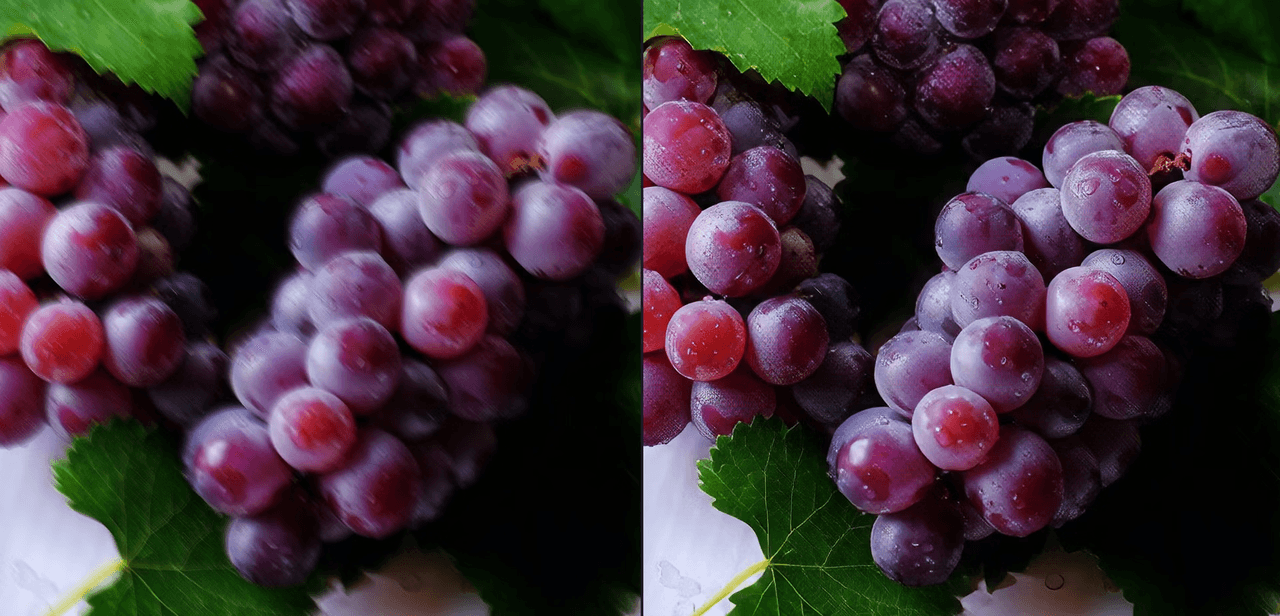
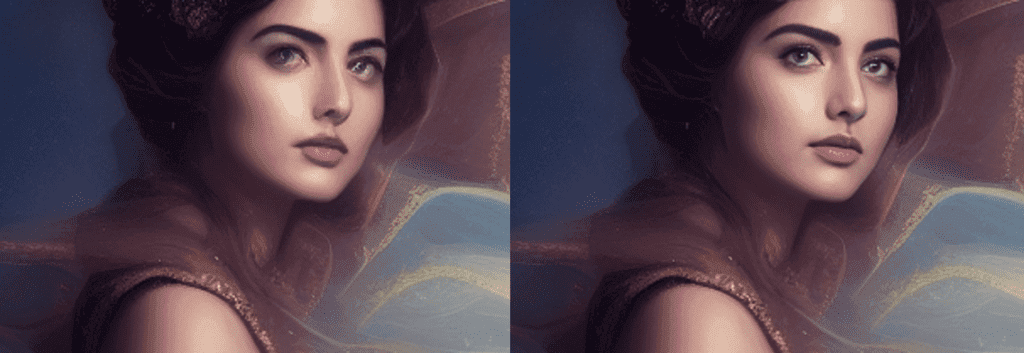
Over-sharpening in Nano Banana usually shows up as crunchy pores, jagged edges on text, and halos around high-contrast transitions. I notice it most when I stack built-in enhancers with external upscalers.
Problem
Images look too digital: exaggerated micro-detail, noisy backgrounds, and harsh outlines around subjects and letters.
Prerequisites
-
A recent Nano Banana build (v3+)
-
A reference image that represents the "softness" or realism you're aiming for
Step-by-step: Taming sharpness and detail
- Dial back Nano Banana's global sharpness:
Set Sharpness to something in this range:
sharpness: 0.2–0.4
clarity_boost: 0–0.15
Understanding contrast adaptive sharpening techniques can help you balance enhancement without introducing artifacts.
- Avoid stacking multiple enhancement stages:
Use either Nano Banana's Detail Boost or an external upscaler, not both at maximum. For professional sharpening workflows, Topaz Labs' sharpen tools offer more granular control for post-processing.
- Use softer samplers for photoreal work:
Prefer Euler, DPM++ 2M, or Nano Banana's Photo Real sampler preset instead of ultra-crisp illustration modes. Learn more about how different samplers affect image quality in AI generation.
- Add prompt guidance that favors realism over micro-detail:
-
In your positive prompt, include: natural skin texture, subtle detail, soft focus background.
-
In your negative prompt, include: over-sharpened, HDR, crunchy details, harsh outlines.
Counter-intuitively, I found that slightly lowering the resolution on the first pass and doing a single clean upscale often looks more realistic than starting huge with max detail from the start.
Correcting Face Distortions in Nano Banana Outputs
Face distortions are brutal when you're creating portraits or ad creatives. One tiny glitch in the eyes or mouth and the entire image feels unusable.
Problem
You're seeing:
-
Asymmetrical or misaligned eyes
-
Teeth fused together or "gummy" smiles
-
Subtle facial warping when you upscale or re-render
Prerequisites
-
A stable face-focused prompt (e.g., close-up portrait, eye level)
-
Nano Banana's Face Refinement or equivalent feature enabled
Step-by-step: Stabilizing faces
- Start with a portrait-friendly base:
Choose a photo/portrait model or style preset inside Nano Banana.
- Tighten your facial prompt:
Positive prompt example:
ultra detailed portrait, symmetrical face, natural expression, accurate anatomy, photorealistic lightingNegative prompt additions:
distorted face, asymmetrical eyes, extra teeth, deformed nose, uncanny valley- Use face-aware refiners sparingly:
Enable Face Refinement but set it in a moderate range:
face_refine_strength: 0.35–0.55- Reduce the number of destructive passes:
Avoid re-running enhancement passes that re-diffuse the entire image. Instead, use inpaint on face only with a soft mask when you need corrections.
- Compare at 100% zoom:
Nano Banana previews can look okay when tiny: always inspect at full size before approving.
Where this fails: if you need pixel-perfect, identity-locked likenesses (e.g., celebrity doubles or strict brand ambassadors), Nano Banana alone may not be enough. Pair it with a dedicated face restoration or identity-matching tool, or consider traditional retouching in Photoshop.
How to Fix Incorrect Hands in Nano Banana Renders
Hands are still one of the toughest anatomy challenges for diffusion models, and Nano Banana is no exception.
Problem
You're getting:
-
Extra fingers or merged digits
-
Twisted wrists or impossible poses
-
Hands that don't match the perspective of the rest of the body
Prerequisites
-
A clear concept of the pose (photo reference helps a lot)
-
Willingness to do a quick inpaint pass instead of chasing the perfect one-shot render
Step-by-step: Guiding better hands
- Be explicit in your prompt:
Positive prompt snippet:
realistic hands, 5 fingers on each hand, natural pose, correct anatomy
Negative prompt snippet:
extra fingers, deformed hands, fused fingers, mangled anatomy
- Simplify the pose first:
Generate with hands partially hidden (in pockets, holding a simple object) to reduce complexity.
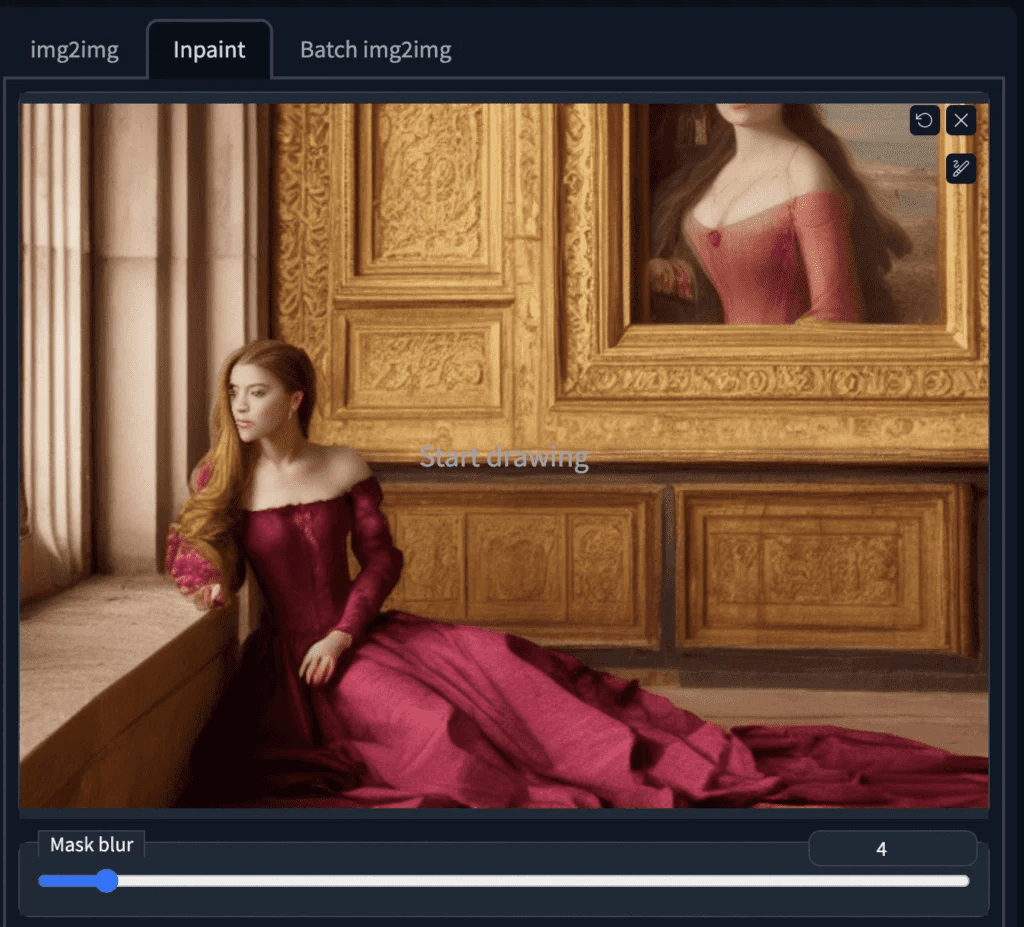
- Use controlled inpainting:
-
Mask just the hand area.
-
Lower the denoise strength:[denoise: 0.35–0.55](denoise: 0.35–0.55)
denoise: 0.35–0.55
- Keep the same seed so the rest of the body stays consistent.
- Limit resolution jumps around hands:
Huge upscales can re-interpret finger edges. Try a moderate upscale (1.5–2x) then clean up by inpainting at final resolution.
If you need vector-perfect, brand-safe hand icons or gesture logos, Nano Banana isn't the right tool. In those cases, I stick to Figma/Illustrator and only use AI for mood boards or reference poses.
Clean-Up Tips for Flawless Nano Banana Results
Once you've tamed sharpening, faces, and hands, a small clean-up workflow is what turns "pretty good" into "usable in a campaign."
Fast clean-up routine
- Check edges and backgrounds
Look for ghosted limbs, halos, or duplicated objects. Use Nano Banana's Background Cleanup (if available) at low strength, or mask and inpaint noisy zones.
- Fix text clarity
Generate text separately when possible:
-
First pass: subject and layout
-
Second pass: inpaint area for text with a clear prompt, e.g.:
bold sans-serif text "SUMMER DROP", centered, clean edges, high contrast
Avoid tiny fonts: think like a poster designer.
- Final pass in a traditional editor
I almost always do a last sweep in Photoshop, Affinity, or Photopea for:
-
Tiny clone/heal fixes
-
Color consistency with your brand palette
For more advanced image enhancement workflows, explore AMD FidelityFX SDK and professional tools like Topaz Labs for final polishing.
Ethical considerations when fixing Nano Banana errors
As AI images get closer to photoreal, I've found it's more important to stay transparent about what's AI-generated and what isn't. For client work or public campaigns, I label any Nano Banana output as AI-assisted in the project notes or metadata, and I make that clear if there's a risk of confusion.
Bias is another quiet error source. If you notice Nano Banana defaulting to a narrow range of skin tones, body types, or ages, actively counter it in your prompts (e.g., explicitly specifying diverse subjects), and review your outputs with that lens. Don't just accept the first image that looks "polished."
Finally, copyright in 2025 is still evolving. My practice is simple: I avoid asking Nano Banana to imitate specific living artists or reproduce trademarked characters. For logos, mascots, or key brand assets, I treat the AI output as a rough concept, then rebuild the final in a vector tool. That keeps ownership and licensing much cleaner.
For more information on common AI image problems and solutions, explore comprehensive troubleshooting resources.
If you apply these workflows consistently, you'll spend far less time fighting weird Nano Banana errors and far more time actually creating.
Frequently Asked Questions
What are the most common Nano Banana errors and what causes them?
The most common Nano Banana errors include over-sharpened images, subtle face distortions, broken or extra fingers, and haloing around text. These usually come from overly aggressive enhancement settings, too many passes or upscales, and vague or conflicting prompts that confuse anatomy, lighting, or perspective.
How do I fix over-sharpened or crunchy-looking Nano Banana renders?
To fix over-sharpened Nano Banana renders, lower global sharpness to roughly 0.2–0.4 and keep clarity_boost below about 0.15. Avoid stacking multiple enhancers and use softer samplers like Euler or Photo Real. Favor realistic prompt wording and use a single, clean upscale instead of multiple re-interpretations.
How can I reduce face distortions and warped eyes in Nano Banana?
Use a portrait-friendly base model and tighten your facial prompt with terms like "symmetrical face" and "accurate anatomy." Add negatives such as "distorted face" and "extra teeth," enable Face Refinement at moderate strength (around 0.35–0.55), and rely on targeted inpainting for fixes instead of repeatedly re-diffusing the entire image.
What's the best way to fix incorrect hands in Nano Banana images?
For hand-related Nano Banana errors, be explicit in prompts with "realistic hands, 5 fingers, natural pose" and strong negative prompts for extra or fused fingers. Simplify poses, then inpaint only the hand area with a lower denoise value (around 0.35–0.55) while keeping the same seed to preserve the rest of the body.
Can Nano Banana errors affect text clarity, and how do I get readable text?
Yes, Nano Banana can introduce halos and jagged edges around text, especially when sharpening and upscaling are stacked. For readable text, generate the layout first, then inpaint the text area with a clear font description and short wording. Avoid tiny fonts and finish with light cleanup in a traditional image editor.