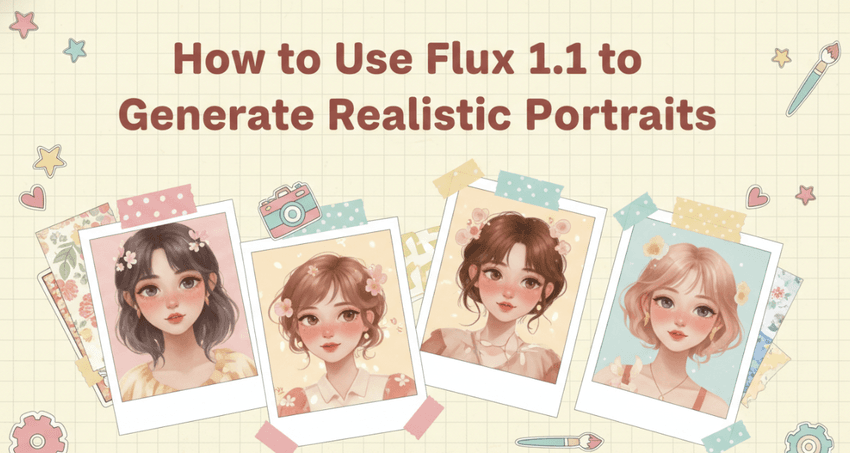
Dora is here. If you've been wrestling with flat skin, weird teeth, or characters that keep changing, this guide is for you. By the end, you'll have a clear, repeatable workflow for Flux 1.1 portraits, fast, photoreal, and production-safe. AI tools evolve rapidly. Features described here are accurate as of December 2025.
Why Flux 1.1 Is Ideal for Portraits (Quality & Realism)
Flux 1.1 handles faces with a steadier hand than earlier Flux builds and many SDXL forks I've used. Skin gradations render like a careful dodge-and-burn rather than plastic blur, and micro-contrast in pores and hair strands feels natural instead of crunchy. Counter-intuitively, I found that a slightly lower CFG paired with strong lighting cues gives more believable skin than pushing the guidance high.
Evidence: using the prompt below, Flux 1.1 produced lifelike subsurface scattering on cheeks and accurate catchlights.
Prompt tested:
30-year-old East Asian woman, medium-length wavy hair, natural makeup, soft smile, studio portrait, 85mm lens look, f/2.2 depth of field, Rembrandt lighting, neutral gray backdrop, high dynamic range, skin texture visible, no retouch blur.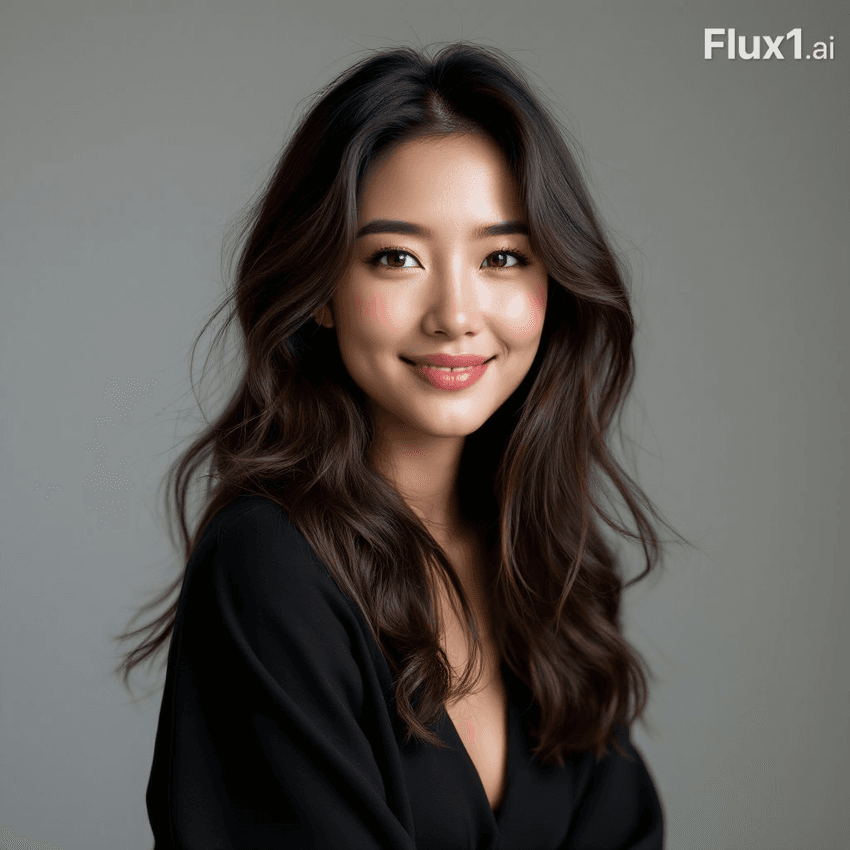
Why it works: the focal-length cue ("85mm look") controls perspective, while a clear lighting style ("Rembrandt") anchors shadows, letting Flux 1.1's learned facial priors settle into realistic planes. You can explore the core research behind this in the official paper: Flux 1.1 diffusion model research (arXiv)
Base Settings for Best Results
Set these once as your baseline, then deviate intentionally. This is the detail that changes the outcome...
Recommended parameters:
Steps: 28–36

CFG / Guidance: 4.5–6.0

Resolution: 768×1024 (portrait) or 1024×1024 (square)

Sampler: DPM++ 2M Karras (or model's default high-fidelity sampler)

Seed: Fixed for consistency work: random for exploration

Face Restore: Off by default (use selectively in post)

Upscale: 1.5–2× with a detail-preserving model: avoid heavy denoise


Negative prompt (light): cartoon, plastic skin, extra fingers, distorted teeth, harsh sharpening, watermark, text overlay
Quick setup steps:
-
In the UI, set Steps to 32 and CFG to 5.5.
-
Choose Resolution 768×1024 for head-and-shoulders.
-
Lock a Seed when testing lighting or consistency.
-
Keep Face Restore off initially: evaluate skin texture first.
Adjustments feel like a physical camera: turning CFG is like tightening a manual lens, too tight and expression stiffens: too loose and details soften. If images look over-processed, reduce sharpening in your workflow and keep the negative prompt modest rather than sprawling.
Effective Portrait Prompt Structure

Use a stable structure so your variations remain controlled.
Template:
[Subject & Demographics]: {age}, {ethnicity}, {gender expression}

[Styling]: {hair}, {makeup}, {wardrobe}

[Lensing]: {85mm portrait look}, {f/stop}, {camera distance}

[Lighting]: {Rembrandt | clamshell | window light}, {time of day if natural}

[Composition]: {head-and-shoulders | 3/4}, {eye level | low angle}

[Background]: {neutral gray | textured studio paper | location}


[Quality Cues]: high dynamic range, accurate skin texture, subtle film grain

[Negative]: cartoon, plastic skin, extra fingers, distorted teeth, harsh sharpening
Lighting & Composition Guide
Start with one of these reliable setups:
-
Rembrandt (one key at ~45°, slight fill): adds cheekbone depth and refined nose shadow.
-
Clamshell (beauty) lighting: key above, reflector/fill below: smooth skin but keep texture.
-
Window light (overcast): soft, directional: pair with darker background for pop.
Composition tips:
-
"85mm portrait look" keeps proportions flattering. If your tool accepts exact mm, try 85–105mm equivalents.
-
Use "head-and-shoulders" to avoid hand artifacts: introduce hands deliberately later.
-
Backgrounds matter: a mid-tone seamless makes skin tones easier to judge than pure white.
Workflow:
-
Start with Rembrandt + head-and-shoulders.
-
Iterate 3–5 seeds: pick the best bone structure/pose.
-
Then vary only one element (lighting OR background) per round to avoid chaos.
Fixing Hands, Teeth & Skin in Flux 1.1 Portraits
Hands, teeth, and skin texture are the usual culprits. Solve them methodically.
Hands
-
Prefer 3/4 compositions where hands are cropped or partially visible.
-
If hands must show: prompt "relaxed hands at chest level, no finger splay."
-
Use a higher step count (36) and keep CFG ≤5.5 to reduce finger duplication.
Teeth
-
Prompt specifically: "closed-mouth smile" or "subtle smile, no teeth."
-
If showing teeth: add "even teeth, no gaps, natural shade."
-
Post-pass: very light denoise on the mouth region only: avoid global face restore.
Skin
-
Keep "realistic skin texture, subtle film grain" in the main prompt.
-
If plastic: lower CFG by ~0.5, reduce sharpening in your upscale, and switch to Rembrandt.
-
If blotchy: increase fill light in the prompt ("soft fill from camera axis").
Where it fails
- If you need vector-perfect logos on teeth braces or pixel-accurate manicures, Flux 1.1 isn't the right tool, use a vector editor or manual retouching in Photoshop.
Character Consistency in Flux 1.1 Portraits
Three approaches, from light-touch to locked-down:
-
Seed + Template: fix the seed and keep the same lens, lighting, and composition lines. Change only wardrobe/background.
-
Reference Conditioning: if your Flux 1.1 setup supports image conditioning, feed a clean headshot and set strength to ~0.25–0.35 so identity holds while lighting changes.
-
Descriptor Anchors: repeat 3–4 consistent identity traits ("almond eyes, small scar above left brow, heart-shaped face").
If the face drifts after 3–4 iterations, reset the seed, reapply your exact prompt skeleton, and reintroduce variations one at a time.
Final Portrait Checklist
Use this before exporting:
-
Eyes: sharp at nearest eye: natural catchlights, no double pupils.
-
Skin: texture visible, no waxy blur: tone consistent across face and neck.
-
Mouth: if teeth visible, no extra incisors, shape symmetrical.
-
Hands (if present): five fingers per hand, relaxed pose, no merges.
-
Lighting: key and fill consistent with prompt: shadows not clipped.
-
Background: no stray artifacts, banding, or text overlays.
-
Export: upscale 1.5–2×, avoid heavy denoise: save a prompt/seed log.
Ethical Considerations
Transparency: If you publish AI-generated portraits, label them. I add a short line in captions or alt text indicating "AI-assisted portrait via Flux 1.1," plus the date. It's simple, builds trust, and prevents confusion.
Bias mitigation: Portrait models inherit biases from training data. In practice, I counter this by explicitly diversifying prompts (age, skin tone, cultural markers) and by reviewing sets for representation balance before delivery. When tuning lighting or makeup, I avoid defaults like "beauty lighting" without context, some presets can flatten darker skin tones. Specify lighting and exposure per subject.
Copyright/ownership in 2025: Check your tool's license terms and your client contracts. Use only references you have rights to, and avoid real-person likeness without consent. When you use image conditioning, keep a record of sources and permissions. For commercial projects, store prompts, seeds, and settings alongside outputs so provenance can be audited.
Flux 1.1 Portraits: Frequently Asked Questions

What are the best base settings for Flux 1.1 portraits?
Start with Steps 28–36 and CFG 4.5–6.0. Use 768×1024 for head-and-shoulders (or 1024×1024 square). Sampler: DPM++ 2M Karras. Keep Face Restore off initially; upscale 1.5–2× with light denoise. Use a concise negative prompt to avoid plastic skin, harsh sharpening, and artifacts.
How should I structure a portrait prompt in Flux 1.1 for reliable results?
Use a stable template: Subject/Demographics, Styling, Lensing (e.g., “85mm portrait look,” f-stop), Lighting (Rembrandt, clamshell, or window light), Composition (head-and-shoulders), Background, Quality cues (realistic skin texture), and a short Negative list. Clear lens and lighting cues stabilize facial geometry in Flux 1.1 portraits.
How do I fix hands, teeth, and skin issues in Flux 1.1 portraits?
Hands: prefer head-and-shoulders or prompt “relaxed hands,” run Steps ~36, keep CFG ≤5.5. Teeth: prompt “closed-mouth smile,” or specify “even teeth, natural shade,” then lightly denoise mouth only. Skin: include “realistic skin texture,” lower CFG ~0.5, reduce sharpening, switch to Rembrandt, and add soft fill if blotchy.
How can I keep character identity consistent across Flux 1.1 portraits?
Use Seed + Template (fixed lens, lighting, composition), or image conditioning with strength ~0.25–0.35 to hold identity while changing light. Repeat 3–4 descriptor anchors (e.g., scar, eye shape). If the face drifts after several iterations, reset the seed and reapply the exact prompt skeleton.
Flux 1.1 portraits vs SDXL forks: which is better for photorealism?
For headshot realism, Flux 1.1 often renders steadier faces and lifelike skin at modest CFG when lighting is well specified. Some SDXL forks can appear crisper but risk plastic skin or crunchy micro-contrast. Prefer Flux 1.1 for natural skin and facial stability; choose SDXL variants for stylization or heavy makeover looks.