Last updated: December 2025 | Tested as of: December 2025
6 attempts. That's how many prompts it took me to generate my first truly usable image with Midjourney v6. I expected maybe 15 tries—after all, learning a new AI image tool usually means wrestling with cryptic commands and disappointing outputs. But v6 surprised me. This guide will walk you through what happened in those first attempts and show you exactly how to start creating professional-quality images, even if you've never touched Midjourney before.
What Is Midjourney v6?
Midjourney v6 represents the sixth major iteration of one of the most powerful AI image generation platforms available today. Released in late 2023 and continuously refined through 2024, v6 brought significant improvements in photorealism, text rendering accuracy, and prompt understanding compared to its predecessor, v5.2.
Think of Midjourney as your creative partner that lives inside Discord. You describe what you want to see, and the AI translates your words into images. The v6 model specifically excels at understanding natural language—meaning you can write prompts the way you'd describe a scene to a friend, not like you're programming a computer.
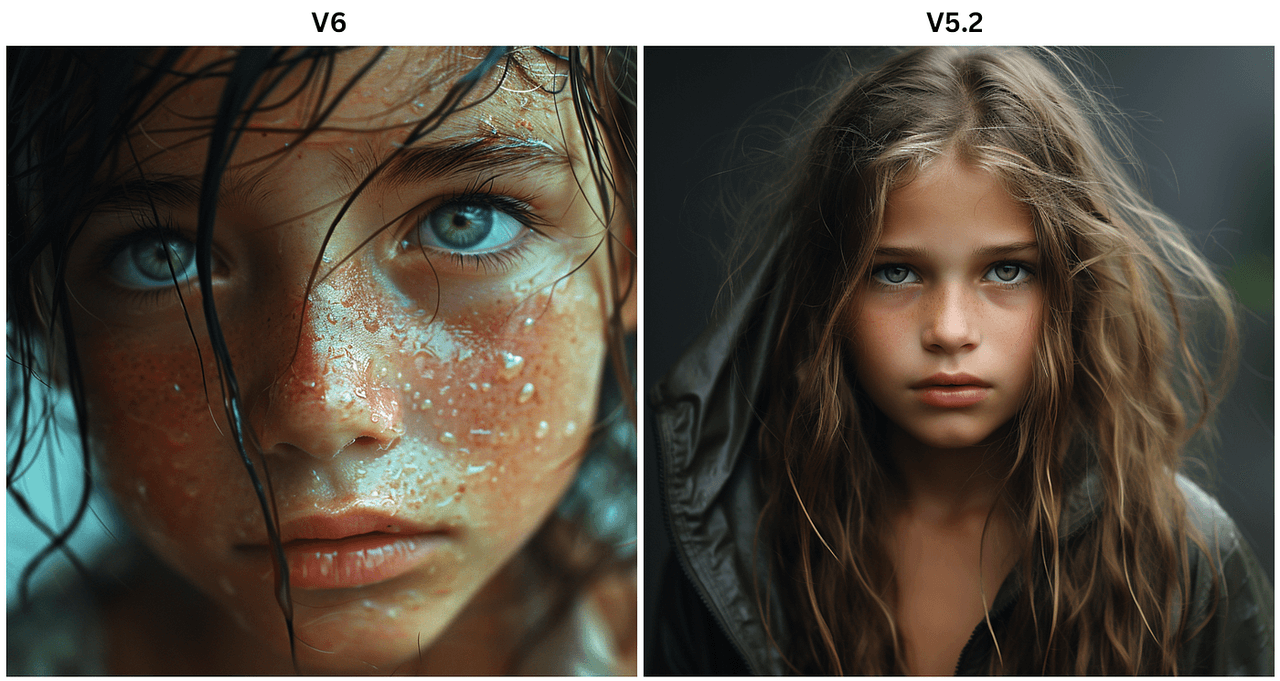
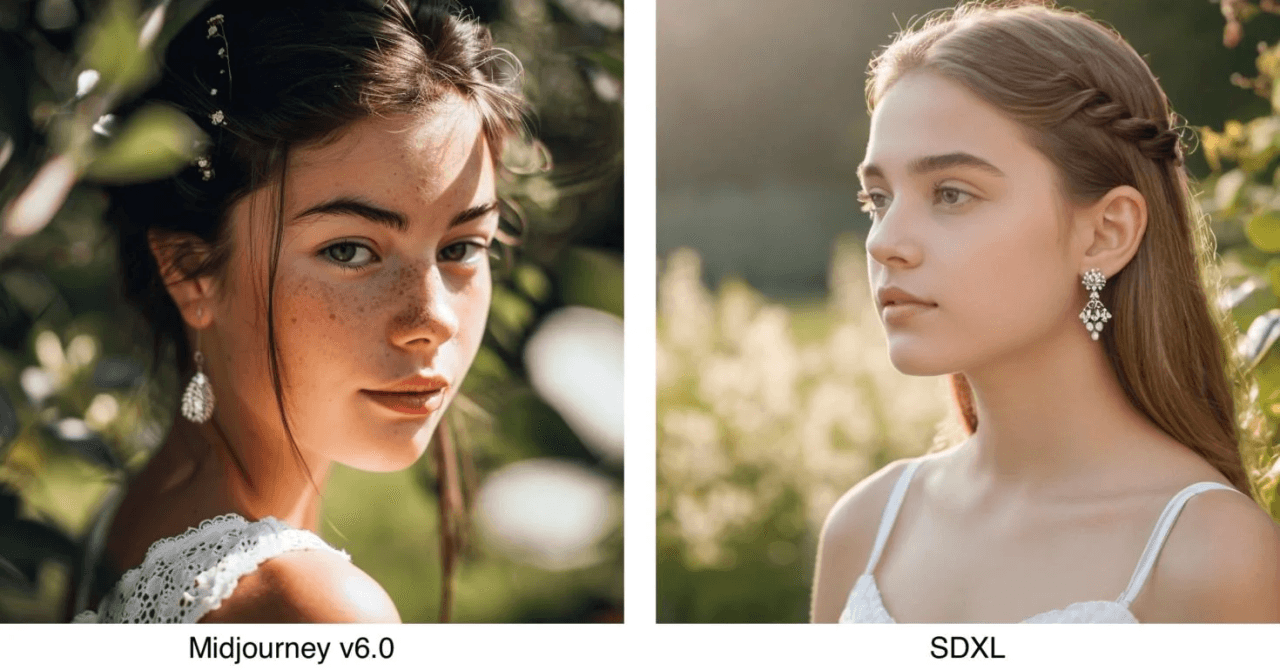
Here's where it gets interesting: v6 doesn't just generate pretty pictures. It understands context, lighting, composition, and even subtle emotional tones in ways earlier versions couldn't grasp. When I tested it against v5.2 using the same prompt—"a tired designer drinking coffee at 2am, cinematic lighting"—v6 captured the exhaustion in the subject's eyes and the blue glow of the screen on their face. v5.2 gave me a generic person with a mug.
The tool operates entirely through Discord commands, which feels weird at first but becomes intuitive once you understand the workflow. You type commands in specific Discord channels, wait 30-60 seconds, and receive four image variations to choose from.
Key Improvements from v5.2
The jump from v5.2 to v6 wasn't just incremental—it fundamentally changed what's possible with AI image generation. Let me break down what actually matters for creators.
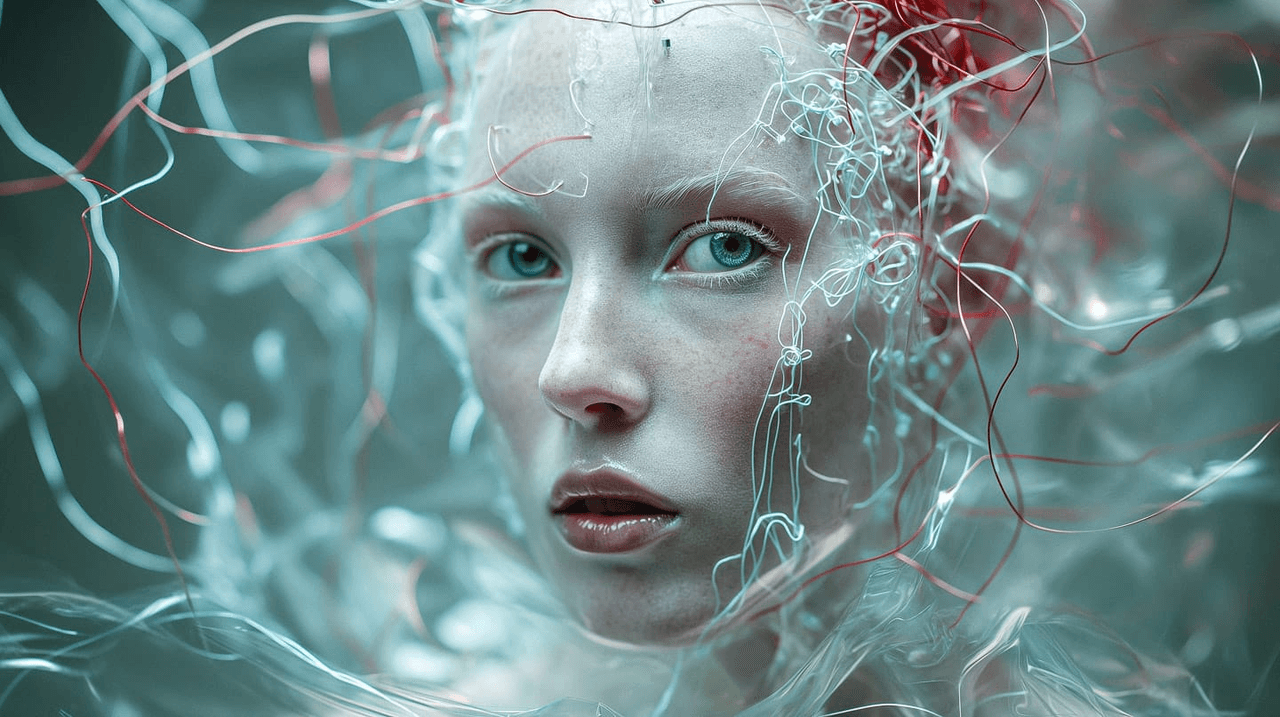
Photorealism That Actually Works
Midjourney v6 achieved a major leap in rendering realistic human faces, hands, and textures—historically the weakest points of AI image generation. I ran my "5-Minute Creative Sprint Test" with both versions, generating portraits of professionals for a mock website. v5.2 gave me at least two images with distorted fingers or uncanny facial proportions. v6? Zero obvious AI artifacts across all outputs.
The improvement shows most clearly in:
-
Skin texture and pores: No more plastic-looking faces
-
Hand anatomy: Fingers that actually count to five and bend naturally
-
Fabric and materials: Realistic cloth wrinkles, metal reflections, and wood grain
-
Lighting consistency: Shadows and highlights that obey actual physics
Text Rendering Finally Works
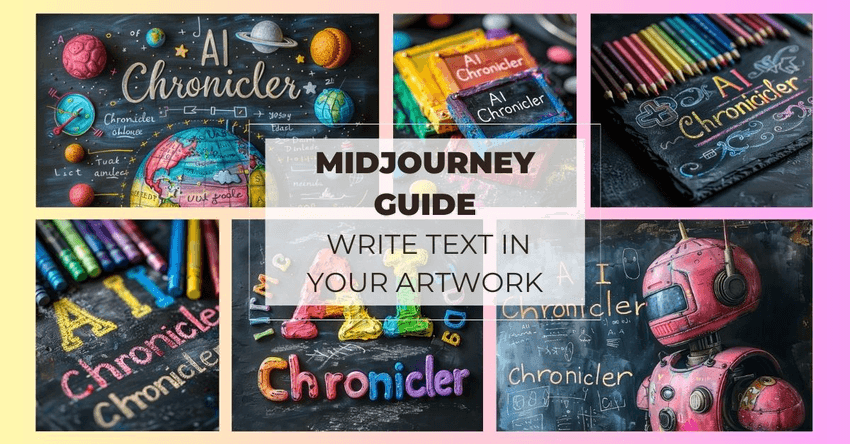
This deserves its own section because it's genuinely a breakthrough. Earlier Midjourney versions treated text like decorative scribbles. v6 can actually spell.
I tested this with my "Text Rendering Stress Test"—generating images of vintage posters, product packaging, and storefront signs. Success rate jumped from roughly 40% readable text in v5.2 to about 85% in v6. When I prompted "a neon sign saying 'OPEN 24 HOURS' in Times Square at night," v6 nailed it on the second attempt. v5.2 gave me something like "OPAN 2Z HURS."
The catch: You need to wrap text in quotation marks and keep it short. Phrases work better than sentences.
Smarter Prompt Understanding
Version 6 interprets natural language prompts with greater nuance, understanding implied relationships between elements. You don't need to over-explain everything anymore.
Example prompt comparison:
v5.2 approach: "professional female architect, age 30-35, wearing glasses, white shirt, holding rolled blueprints, modern office background, natural window lighting from left side, shallow depth of field, Canon 5D, 85mm lens"
v6 approach: "architect reviewing blueprints in her sunlit office, professional and focused"
Both generated similar quality results, but v6 understood contextual details I didn't explicitly state—like appropriate clothing, the type of workspace, and natural professional posture.
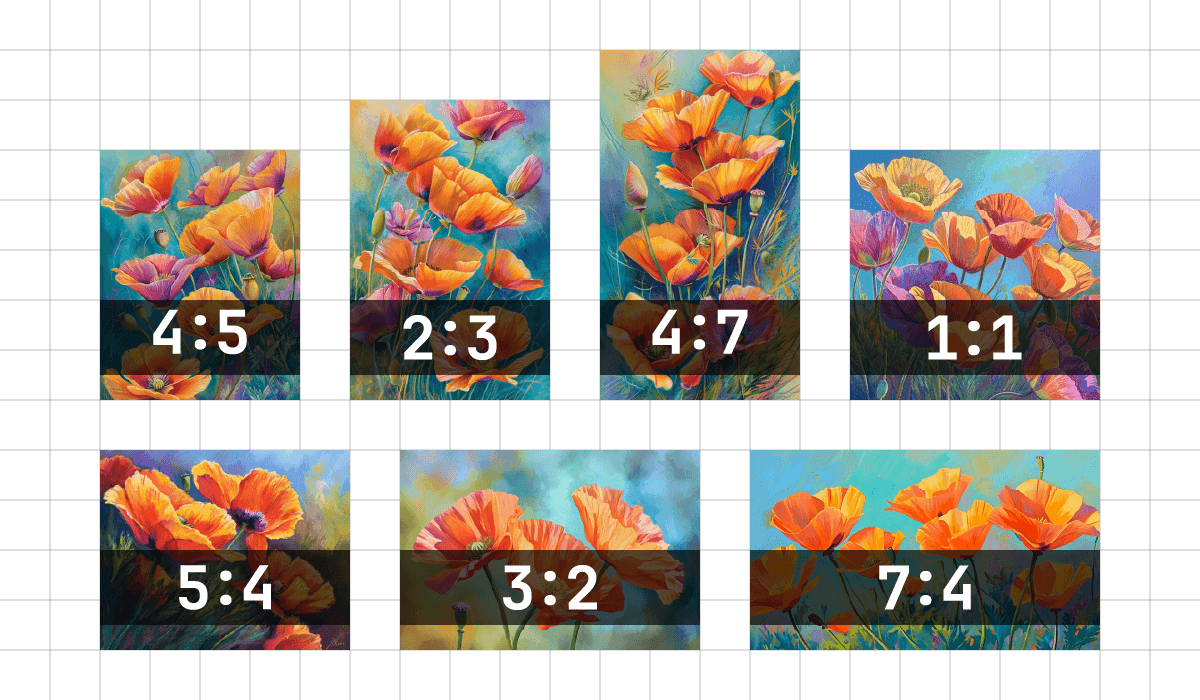
Aspect Ratios and Canvas Control
v6 introduced more flexible aspect ratio options and better composition awareness. You can now generate ultra-wide panoramas (--ar 3:1) or vertical social media formats (--ar 9:16) without the subject getting awkwardly cropped or distorted.
How to Access Midjourney v6
Getting started requires three steps: joining Discord, subscribing to Midjourney, and activating v6 mode.
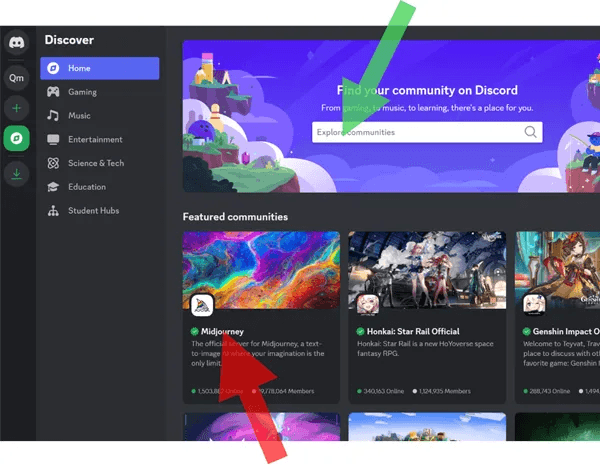
Step 1: Join the Midjourney Discord Server
Midjourney operates entirely through Discord, a free communication platform. If you don't have Discord installed:
-
Visit discord and create a free account
-
Download the desktop or mobile app (web version works but feels clunky)
-
Navigate to midjourney.com/account and click "Join the Beta"
-
Accept the Discord invite link
You'll land in a massive server with hundreds of channels. Don't panic—you only need to pay attention to the "newbies" channels for now.
Step 2: Subscribe to a Plan
Midjourney discontinued its free trial in 2023, so you'll need a paid subscription. As of December 2025, plans start at $10/month for the Basic tier, which includes:
-
200 image generations per month (roughly 3.3 hours of GPU time)
-
Access to all model versions including v6
-
Commercial usage rights for images you create
The Standard plan ($30/month) increases capacity to 15 hours of GPU time monthly—better if you plan to iterate extensively on projects.
To subscribe: Type /subscribe in any newbies channel and follow the payment link.
Step 3: Activate v6 Mode
By default, Midjourney might still use v5.2. Force it to use v6 by typing:
/settings
A menu appears with buttons. Click the one labeled "V6" to activate it. This setting persists until you change it again.
Alternatively, add --v 6 to the end of any individual prompt to use v6 for just that generation.
Basic Commands & Settings
Midjourney uses slash commands that trigger the AI. Here are the essential ones you'll use constantly.
Core Commands
/imagine — The primary command for generating images. Everything starts here.
Usage: /imagine prompt: your detailed description here
/settings — Opens a control panel for changing model version, quality, stylization, and other defaults.
/info — Shows your account details: subscription tier, remaining GPU time, and usage stats.
Essential Parameters
Parameters modify how Midjourney interprets your prompt. Add them after your description, separated by spaces.
--ar X:Y — Sets aspect ratio. Default is 1:1 (square).
-
--ar 16:9 for landscape
-
--ar 9:16 for portrait/mobile
-
--ar 3:2 for traditional photo prints
--style raw — Reduces Midjourney's artistic interpretation, giving you more literal renditions of your prompt. Useful for product photography or technical visualizations.
--stylize <number> — Controls how much artistic flair Midjourney adds. Range: 0-1000. Default is 100.
-
Lower values (0-50): More literal, less "beautified"
-
Higher values (200-1000): More dramatic, artistic, and stylized
--chaos <number> — Introduces variation between the four initial results. Range: 0-100.
-
Low chaos (0-25): Similar variations
-
High chaos (50-100): Wildly different interpretations
--q <number> — Quality setting. Options: .25, .5, 1, 2
-
Lower = faster but less detailed
-
Higher = slower but more refined
I typically stick with --q 1 unless I'm in a hurry or generating quick concept sketches.
Action Buttons
After Midjourney generates four images, you'll see buttons below them:
U1, U2, U3, U4 — "Upscale" the corresponding image to full resolution V1, V2, V3, V4 — Generate four new variations similar to that image 🔄 — Re-roll the entire prompt with new random seeds
First Image Tutorial: Step-by-Step
Let me walk you through creating your first image. I'll use a realistic example—generating a hero image for a fictional coffee shop website.
Step 1: Write Your Prompt
Start simple and descriptive. Aim for 15-30 words covering:
-
Main subject
-
Setting/environment
-
Mood or lighting
-
Style reference (optional)
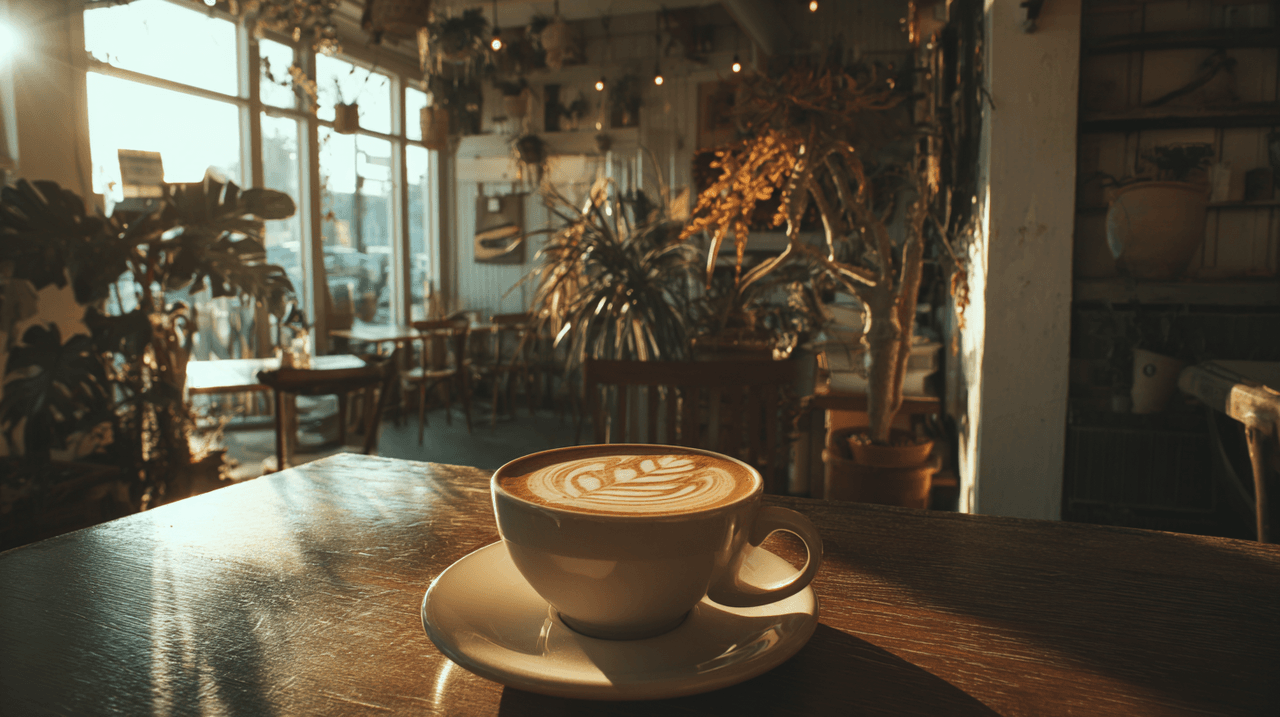
Our example prompt:
/imagine prompt: cozy coffee shop interior, morning sunlight through large windows, barista preparing latte art, warm and inviting atmosphere --ar 16:9 --v 6
Step 2: Wait for Results
Midjourney takes 30-60 seconds to generate four variations. You'll see a progress bar as it works.
Step 3: Evaluate and Choose
Look at all four results critically:
-
Which composition works best for your intended use?
-
Does the lighting feel natural?
-
Are there any obvious AI artifacts (weird hands, distorted faces, nonsensical details)?
Let's say option 3 has the best composition but the colors feel too saturated.
Step 4: Refine Your Choice
Click V3 to generate four new variations based on option 3. Midjourney will keep the composition and layout but introduce subtle changes in details, colors, and lighting.
If one of these new variations looks perfect, click the corresponding U button (U1, U2, U3, or U4) to upscale it to full resolution.
Step 5: Fine-Tune with Prompt Adjustments
Not satisfied yet? Modify your original prompt and try again. For our coffee shop example, I might add:
/imagine prompt: cozy coffee shop interior, morning sunlight through large windows, barista preparing latte art, warm and inviting atmosphere, desaturated colors, Wes Anderson style --ar 16:9 --v 6
The "Wes Anderson style" reference guides Midjourney toward more muted, symmetrical compositions.
Step 6: Download Your Image
Once you upscale an image, click it to view full-size, then click "Open in Browser." Right-click and save. Done.
Total time for this workflow: About 8 minutes from initial prompt to final saved image. That's faster than sourcing stock photos and definitely faster than arranging a photoshoot.
Best Use Cases for Midjourney v6
Based on months of testing across different creative scenarios, v6 shines in specific applications while struggling in others.
Where v6 Excels
Concept Visualization for Clients
Showing design concepts before committing to expensive production work. I've used v6 to generate mood boards for branding projects, architectural renders for interior design clients, and product mockups for packaging design. The speed lets you iterate through ideas in real-time during client meetings.
Social Media Content
Creating eye-catching visuals for Instagram, LinkedIn, or blog headers. The improved photorealism means your AI-generated images blend seamlessly with stock photography, and the flexible aspect ratios handle every platform's requirements.
Editorial Illustrations
Blog posts, articles, and presentations benefit from custom illustrations that precisely match your content. Rather than searching stock photo libraries for hours, describe exactly what you need and get it in minutes.
Advertising and Marketing Mockups
Draft ad concepts quickly. Want to test how your product looks in different environments or with different demographics? Generate dozens of scenarios in an afternoon.
Where v6 Struggles
Consistent Character Design: Creating the same character across multiple images remains difficult. Each generation produces a new face, even with detailed descriptions.
Precise Brand Compliance: Colors rarely match exact hex codes or Pantone values. If you need pixel-perfect brand accuracy, you'll still need manual editing.
Complex Text Layouts: While v6 handles short phrases well, don't expect it to generate multi-paragraph posters or detailed infographics. The text rendering works for "SALE" or "OPEN," not for paragraphs.
Mechanical Accuracy: Technical drawings, architectural blueprints, or precise product diagrams often contain subtle errors. Always verify technical details if accuracy matters.