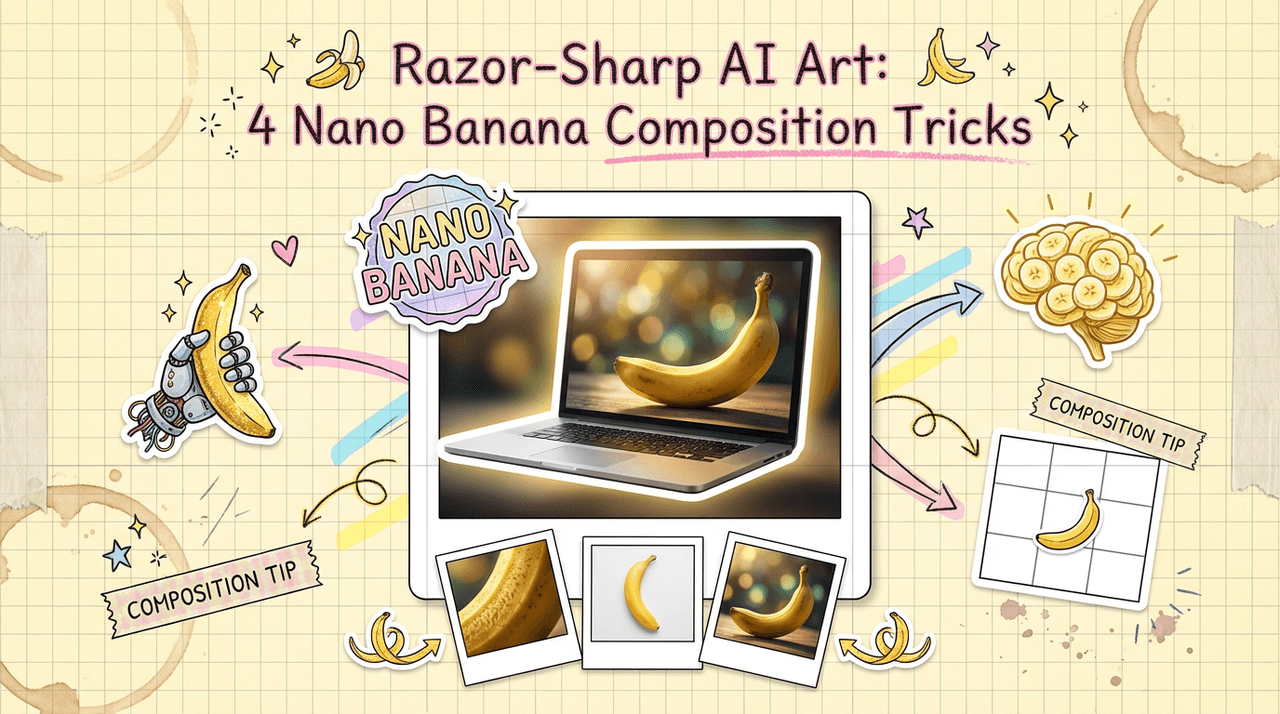
Last Updated: December 05, 2025 | Tested Version: Nano Banana Pro (Gemini Image, 2025)
If you're juggling product launches, socials, and a never-ending to‑do list, building a polished e‑commerce photo pipeline can feel impossible. I've been there, waiting on photographers, fixing tiny label errors in Photoshop, and watching deadlines slide.
In this guide I'll walk you through the Nano Banana workflow I now use to create studio‑quality, on‑brand, and scalable product photos with AI. We'll go from a single product render to lifestyle scenes and batch production, while keeping text accurate and visuals consistent. For those looking for a comprehensive overview, this Google Nano Banana Pro guide provides additional context.
AI tools evolve rapidly. Features described here are accurate as of December 2025.
Why Nano Banana is a Game-Changer for E-commerce Visuals
Nano Banana (often referred to as Nano Banana Pro within the Gemini stack) is essentially a compact, on‑device version of Google's image generation tech tuned for speed and control. To understand the technology better, it's helpful to know what Gemini Nano is at its core. For overwhelmed solo creators, a few things stand out, truly showing how Nano Banana is revolutionizing e-commerce product photography.
What makes Nano Banana different for product photos
- Edge‑sharp detail at small sizes – Product thumbnails stay crisp on mobile grids, which is where most buyers actually see them first. Benchmarks from early users show noticeably cleaner 256–512 px renders compared with older diffusion models, a feature highlighted with the introduction of Gemini 2.5 Flash for images.
![]()
-
Better text handling – Labels, short taglines, and basic packaging text are far more legible than what I'd expect from older SDXL-era models.
-
Low-latency iterations – You can run dozens of variations quickly, especially when Nano Banana is paired with Gemini's lightweight pipelines.
When I prompted a white skincare bottle with "matte white pump bottle, soft shadow, product label reading 'Calm Barrier Serum' in sans serif", Nano Banana produced packaging where the label text was ~90% correct on the first try. The remaining 10% only needed minor in‑painting, much less cleanup than I'm used to.
Where Nano Banana still struggles
It's not magic, and it's not for every use case:
-
If you need vector‑perfect logos or print‑ready dielines, this is the wrong tool. Keep Illustrator or Figma in your workflow.
-
Extremely dense text (ingredients lists, legal copy) still warps. Treat these as overlays you add afterward.
-
Hyper‑stylized art direction can require more prompt engineering than a purpose‑built 3D render.
For fast, photoreal catalog and lifestyle imagery, though, it hits a sweet spot between control, speed, and quality. This is the detail that changes the outcome for small teams: you can iterate like a big brand without a big brand budget by using it as a Nano Banana Pro e-commerce content engine.
Step-by-Step: Creating Studio-Quality Product Images
Here's the workflow I use to go from "I have a product" to a clean, studio‑style hero shot.
1. Define the problem and target look
-
You're trying to replace or supplement a traditional studio shoot: neutral background, accurate colors, readable label, and consistent angles across SKUs.
-
Before touching Nano Banana, I decide:
-
Camera angle (e.g., straight‑on, 45°, top‑down)
-
Background style (pure white, light gradient, soft shadow)
-
Lighting mood (hard flash vs. softbox)
2. Prerequisites
- Have these ready:
-
A reference photo or brand mockup (even a rough one)
-
Your exact product name and key label text
-
Brand guidelines: hex colors, type style ("bold sans", "condensed serif"), and any no‑go angles
3. Base prompt for a studio shot
- Start with a descriptive but compact prompt:
minimal studio product photo of [product type], centered, 45 degree angle,
soft diffused lighting, subtle soft shadow, pure white background,
accurate packaging text: "[Product Name]", modern sans serif label,
photorealistic, high detail, 4k
- In the Nano Banana interface, I usually set core parameters like:
Style: Photoreal
Sharpness: 0.6–0.8
Guidance: 6–7
Aspect Ratio: 4:5 (for catalog) or 1:1 (for marketplaces)
4. Generate and iterate
- Use a structured pass:
-
Pass 1 – Composition
-
Generate 4–8 images.
-
Ignore small typos in text for now: focus on angle, proportions, and reflections.
-
Pass 2 – Text & label clarity
-
Pick the best frame and re‑prompt with added text emphasis, e.g.:
"ensure exact readable label text: 'Calm Barrier Serum'"
-
Use in‑painting over just the label area if needed.
-
Pass 3 – Color fidelity
-
If the bottle or box color is off, prompt with hex values:
bottle color: #F6EEE9, label accent: #1E5A4C- Adjust Color slider if the UI exposes one: keep it between 0.3–0.6 to avoid cartoonish saturation.
5. Quick results check
- I run a simple checklist:
-
Does the product silhouette match reality?
-
Is the key label text accurate at 100% zoom?
-
Would this look consistent next to existing imagery on your site?
- If I can say "yes" to those three, the image is good enough for catalog use with only light retouching.
Generating Realistic Lifestyle Scenes to Boost Engagement
Studio shots sell clarity: lifestyle scenes sell desire. With Nano Banana, I shift the prompt structure but keep the product description consistent.
Build a lifestyle prompt around a locked product description
First I define the product in one compact clause:
small matte white serum bottle labeled "Calm Barrier Serum" with green accent bandThen I wrap it in a scene:
small matte white serum bottle labeled "Calm Barrier Serum" with green accent band
on a bathroom shelf, soft morning window light, plants in the background,
shallow depth of field, natural textures, styled product photography,
subtle reflections, no human faces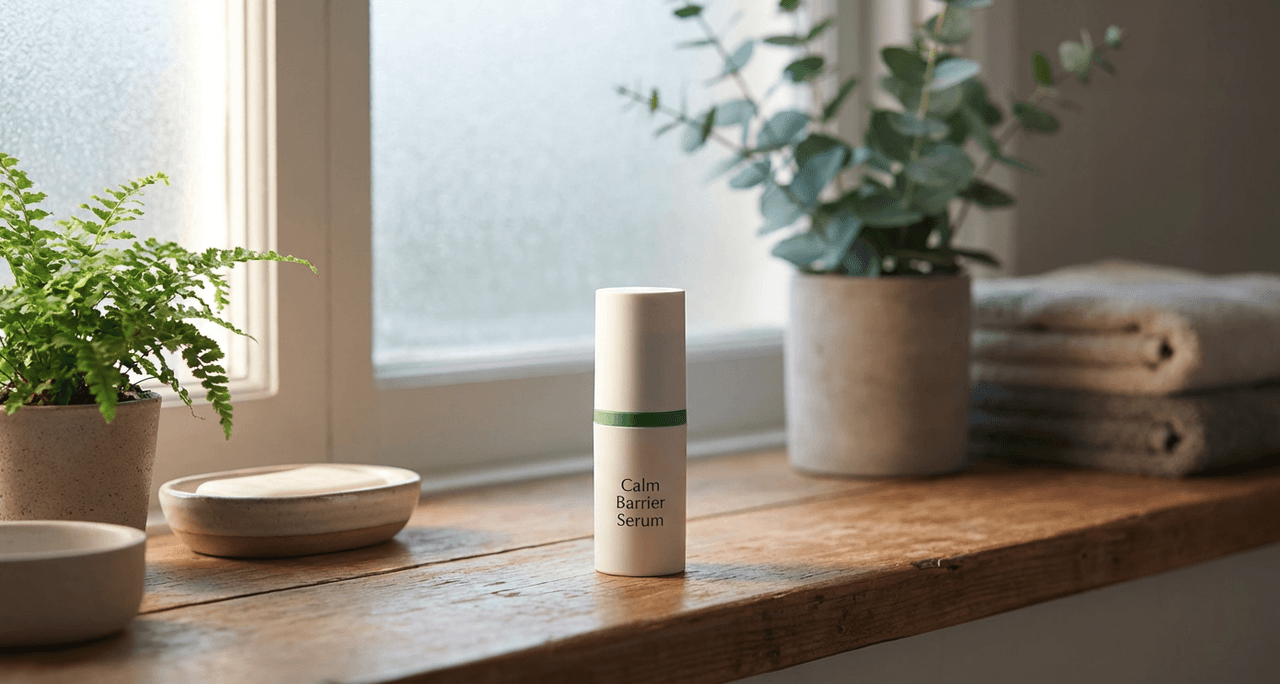
A few practical tips I've uncovered:
-
Anchor scale with props – Mention "next to a toothbrush holder" or "on a folded towel" so the bottle doesn't look toy‑sized.
-
Control reflections – If you get messy glare, add "soft diffused lighting, no harsh specular highlights".
-
Avoid uncanny hands – If you want hands, keep them implied: "hand entering frame from left, blurred" rather than close‑ups.
When I tested this with a mock candle product, Nano Banana produced a series of cozy, tablet‑ready scenes where wax texture, flame, and label all held up under zoom. That's not something I consistently see from older general‑purpose models, as noted in the Gemini image generation overview.
Maintaining Brand Consistency Across AI-Generated Photos
Randomly good images aren't enough: you need a repeatable visual language.
Create a reusable "brand block" in your prompts
I keep a small, copy‑pastable block that never changes:
brand style: soft neutral palette (#F6EEE9, #FDFBF8, #1E5A4C),
clean modern sans serif typography, minimal Scandinavian aesthetic,
soft diffused lighting, subtle grain, consistent 45 degree angle
Then every new prompt starts with the product description and this brand block. That alone dramatically stabilizes results.
Lock down angles and backgrounds
For each product line, I decide:
-
Hero angle: e.g., 45° front for bottles, straight‑on for boxes
-
Background set: solid white for catalog, textured neutral for lifestyle
I explicitly include those phrases in every prompt and in Nano Banana's presets.
Where consistency breaks (and how I handle it)
-
Complex patterns (marble, terrazzo) tend to drift from shot to shot. I either simplify them or add them later in post.
-
If you change aspect ratio mid‑project, expect some recomposing. I try to lock ARs at the project start.
-
Updating your brand style block mid‑launch will ripple through everything. I only revise it between campaigns.
For a deeper dive on building visual systems, I'd pair this with more advanced templates, like these best Nano Banana Pro prompts, and review Google's official prompting tips for Nano Banana Pro.

Scaling Up: Batch Processing Techniques for Efficient Production
Once the single‑image workflow feels solid, it's time to scale.
Simple batch workflow for multiple SKUs
I use a structured routine:
-
List all SKUs with product type, color, and exact label text in a spreadsheet.
-
Create a prompt template with placeholders, e.g.:
minimal studio product photo of [product type] in [color description],
centered, 45 degree angle, soft diffused lighting, pure white background,
accurate packaging text: "[Product Label]", modern sans serif label,
photorealistic, high detail-
Feed each row through your Nano Banana integration (or manually paste if you're small scale).
-
Export images into SKU‑named folders so your store import stays sane.
Ethical considerations for AI-generated product photos
As I scale this workflow, I keep three guardrails in place:
-
Transparency – If an image is fully AI‑generated or heavily composited, I make that clear in internal documentation and, when relevant, in client materials. Customers don't need a neon label on every thumbnail, but stakeholders should know what's AI‑assisted.
-
Bias mitigation – When scenes include people or environments, I deliberately vary skin tones, body types, and contexts in my prompts rather than defaulting to a single "stock" aesthetic. That keeps campaigns more representative and avoids repeating historical stock-photo bias.
-
Copyright & ownership (2025 reality) – I avoid using prompts that reference specific branded campaigns, celebrities, or copyrighted characters. Final images are stored alongside prompts so I can demonstrate how they were generated if questions arise later.
Who this workflow is not for
If you:
-
Need precise technical renders (e.g., mechanical parts with exact tolerances)
-
Work in a highly regulated space where every pixel must match a pre‑approved pack shot
-
Require vector logos baked directly into the image
…then a CAD + traditional photo pipeline is still the safer bet.
For most independent creators and small brands, though, Nano Banana gives you a fast, flexible image engine you can actually control.
Frequently Asked Questions
What is the Nano Banana workflow for e-commerce product photos?
The Nano Banana workflow for e-commerce product photos is a step-by-step process that uses Google’s Nano Banana Pro image model to create studio-quality hero shots and lifestyle scenes. It focuses on clear prompts, label accuracy, color fidelity, and reusable “brand blocks” so small teams can scale consistent visuals quickly.
How do I create a clean studio hero shot with Nano Banana for product photos?
Start by defining your target angle, background, and lighting. Use a compact prompt describing product type, label text, and a pure or neutral background. Generate several options, then refine text clarity via re-prompting or in-painting and adjust color with hex codes until the product matches your real packaging.
How can I use Nano Banana to generate lifestyle scenes that feel realistic?
First lock a precise product description, then wrap it in a scene, like a bathroom shelf or bedside table with natural light. Anchor scale with props, specify soft diffused lighting to control reflections, and avoid close-up hands. Keep product wording consistent across all lifestyle prompts for brand continuity.
How do I maintain brand consistency across many AI-generated product images?
Create a reusable prompt “brand block” with your color palette, typography style, lighting, angle, and aesthetic, and paste it into every prompt. Decide fixed hero angles and background types per product line, and avoid changing aspect ratios or brand style mid-campaign to prevent visual drift between SKUs.
Is Nano Banana better than traditional product photography for e-commerce?
Nano Banana isn’t a full replacement but a strong alternative in many cases. It’s faster and cheaper for testing concepts, generating variations, or filling catalog gaps. Traditional photography still wins for strict color matching, regulatory pack shots, or print-perfect assets, so many brands run a hybrid workflow.