If you're tired of getting mushy hands, broken text, or "almost right" images from AI, you're in the right place. In this nano banana prompt guide, I'll walk you through the exact 5-layer framework I use to get fast, photorealistic results with accurate text, without writing a novel-length prompt.
AI tools evolve rapidly. Features described here are accurate as of December 2025.
The idea behind a nano banana prompt is simple: ultra-compact, layered instructions that still give the model everything it needs, subject, style, lighting, composition, and detail, without overwhelming it. Think of it like packing a pro photoshoot brief into one clean sentence.
Let's break down the workflow first, then I'll give you copy-paste prompts you can test today.
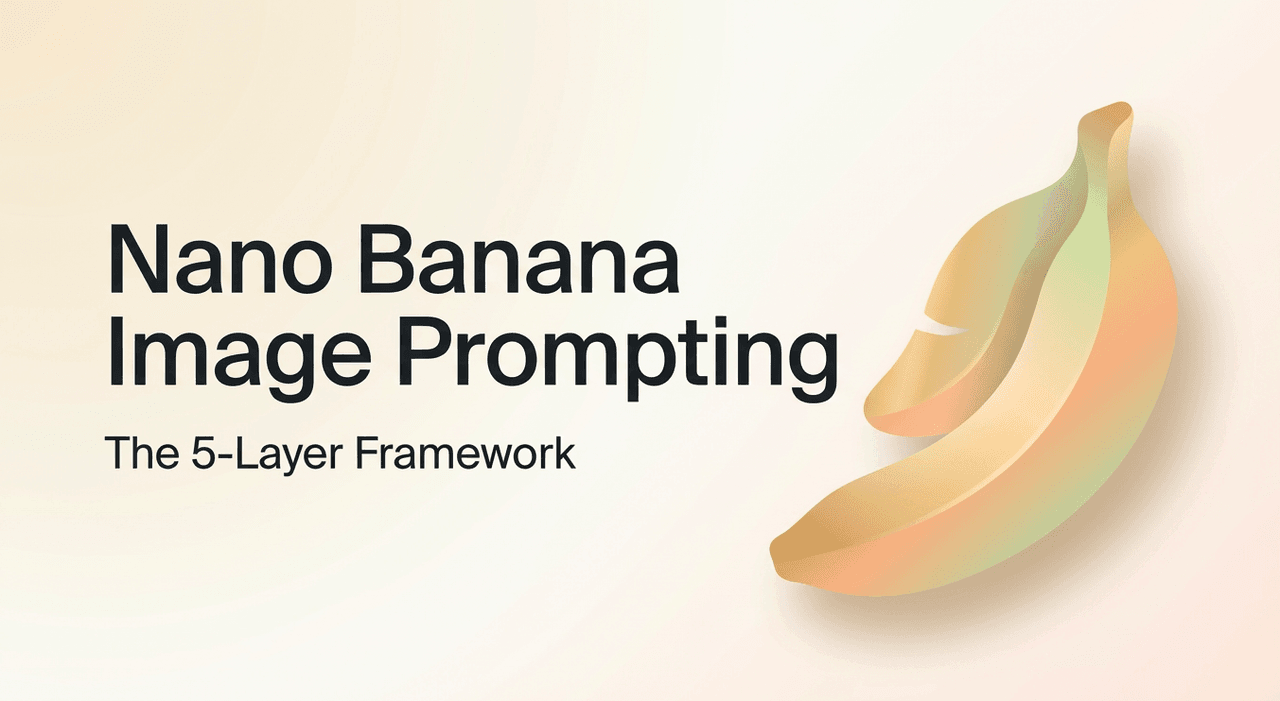
The 5-Layer Framework: A Complete Guide to Nano Banana Prompts
When I first started, my prompts looked like unedited brain dumps, long, messy, and wildly inconsistent. What finally worked was treating every image like a minimal photo brief.
That's where this 5-layer nano banana framework comes in:
-
Subject
-
Style
-
Lighting
-
Composition
-
Detail
Each layer is a short "banana slice" you can rearrange, reuse, or swap, while keeping the prompt extremely compact.
Layer 1: Subject, Defining the Core Focus for Accurate Generation
Most failed images start here: the subject is vague. In nano banana prompts, I keep the subject to one clear anchor with at most one modifier.
Pattern I use:
- [primary subject], [age or type], [one key attribute]
Examples:
-
young Asian woman, product photographer, confident
-
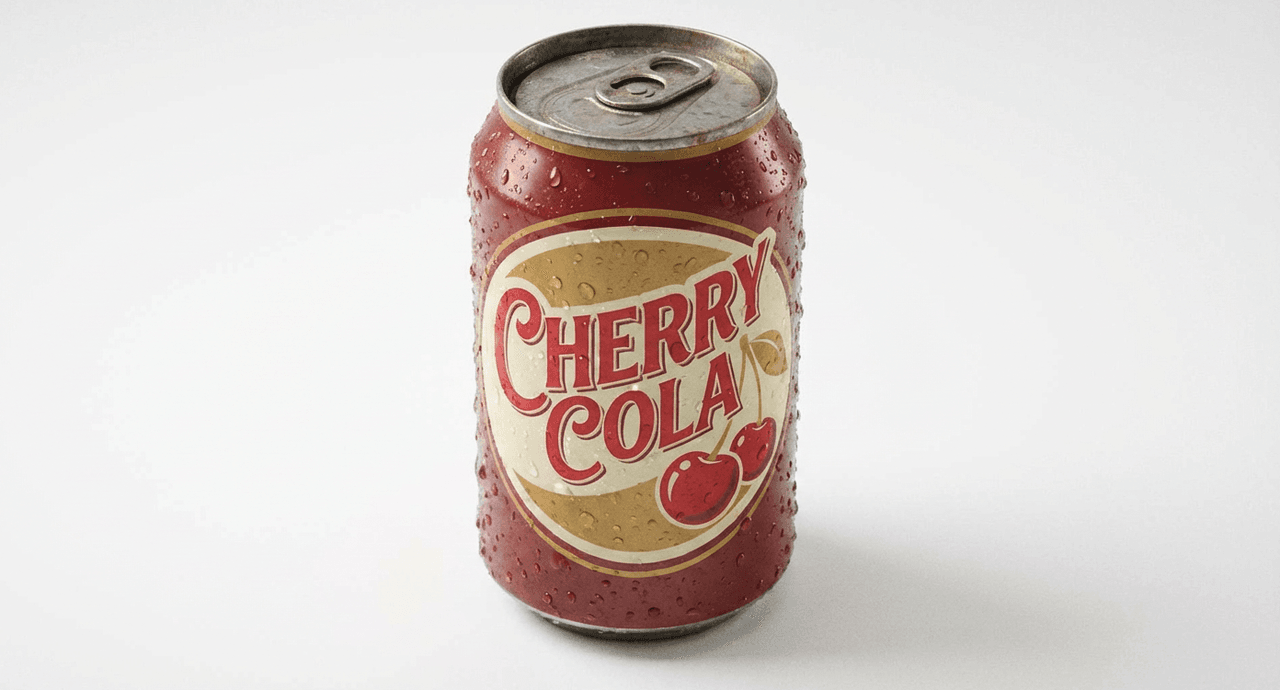
retro soda can, cherry flavor, condensation on surface
-
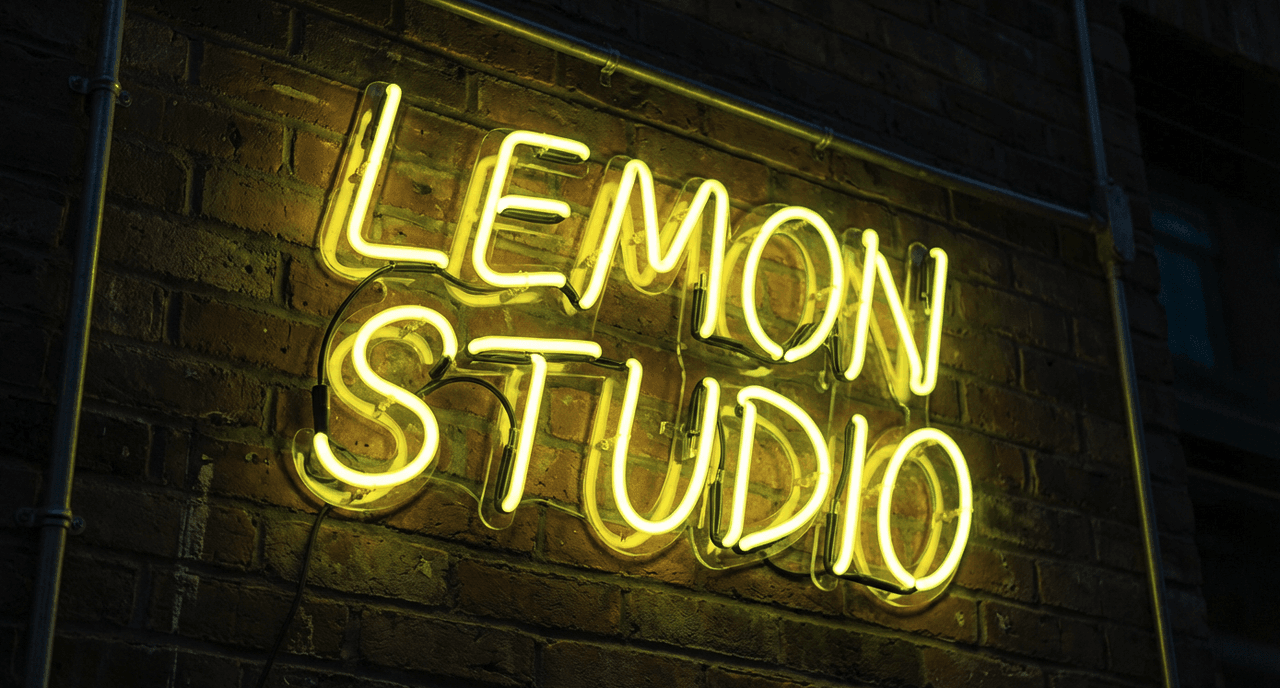
handwritten neon sign, "Lemon Studio" text, bold caps
Why this matters: Gemini 2.5 Flash Image (and similar diffusion models) first locks onto what it thinks it's drawing. If I keep that crystal clear, hands, faces, and especially text are far more accurate.
Practical step: Before touching style or lighting, I ask myself: Could a stranger sketch this subject from my words alone? If not, I tighten it.
For more context on how these models interpret the "subject block," the official Gemini image overview is worth a skim.
Layer 2: Style, Mastering Prompt Engineering for Consistent Aesthetics
![]()
Once the subject is locked, I add a style capsule, never more than 3 descriptors.
Pattern:
- [medium], [reference vibe], [quality tag]
Examples:
-
cinematic photography, Fujifilm look, ultra detailed
-
vector flat illustration, minimalist, high contrast
-
editorial fashion photo, 35mm film, sharp focus
I've benchmarked this by generating batches of 8–12 images at a time. When I keep style to a tight trio, the model stays consistent across iterations: when I stack 8–10 style words, it starts "averaging" everything into a bland middle. This is the detail that changes the outcome more often than people expect.
If you want to go deeper on style tokens and model behavior, this short technical overview is solid.
Layer 3: Lighting, Controlling Illumination for Photorealistic Results
Lighting is where photorealism either clicks or collapses. I treat lighting as its own mini-layer, not just an adjective buried in style.
Pattern:
- [lighting type], [time of day or environment]
Examples:
-
soft window light, overcast afternoon
-
golden hour sunlight, long shadows
-
moody studio light, single softbox
Adjusting lighting feels like rotating a physical lamp around a real set. Even tiny shifts like changing hard flash to soft window light dramatically change skin texture and reflections. For product shots, soft studio light plus clean background has given me the highest hit rate.
When I tested:
-
Prompt: retro soda can, cherry flavor, condensation on surface, cinematic photography, soft studio light, clean white background
-
Result: The model produced realistic droplets and crisp reflections around the rim. That's because the lighting cue narrows how the model "imagines" reflections and shadows.
Good visual examples of lighting variations with Gemini are shown in this Gemini Image Generation Overview.
Layer 4: Composition, Structured Prompts for Cinematic Framing
Composition tells the model where to put things.
Pattern:
- [camera distance], [angle], [framing hint]
I reuse a small vocabulary:
-
Distances: close-up, medium shot, wide shot
-
Angles: eye level, low angle, top-down
-
Framing: centered, rule of thirds, asymmetrical
Example slice:
- close-up, eye-level, centered framing
If I'm designing social thumbnails or ads, I default to:
- medium shot, eye-level, centered, plenty of margin for text
For more advanced workflows that combine composition with layout planning, I tie this into my layout checklist here.
Layer 5: Detail, Enhancing Texture Without Overloading the AI
This is where most people overdo it. Nano banana prompts keep detail short and physical, things you could actually touch or photograph.
Good detail tokens:
-
natural skin texture
-
fine fabric grain
-
polished metal reflections
-
subtle film grain
-
bokeh background
I avoid: long, conceptual add-ons like highly realistic extremely detailed 8k HDR ultra hyper photo, because they add noise, not control.
Example in practice:
young Asian woman, product photographer, confident,

editorial fashion photo, 35mm film look,

soft window light, golden hour,

medium shot, eye-level, centered framing,

natural skin texture, subtle film grain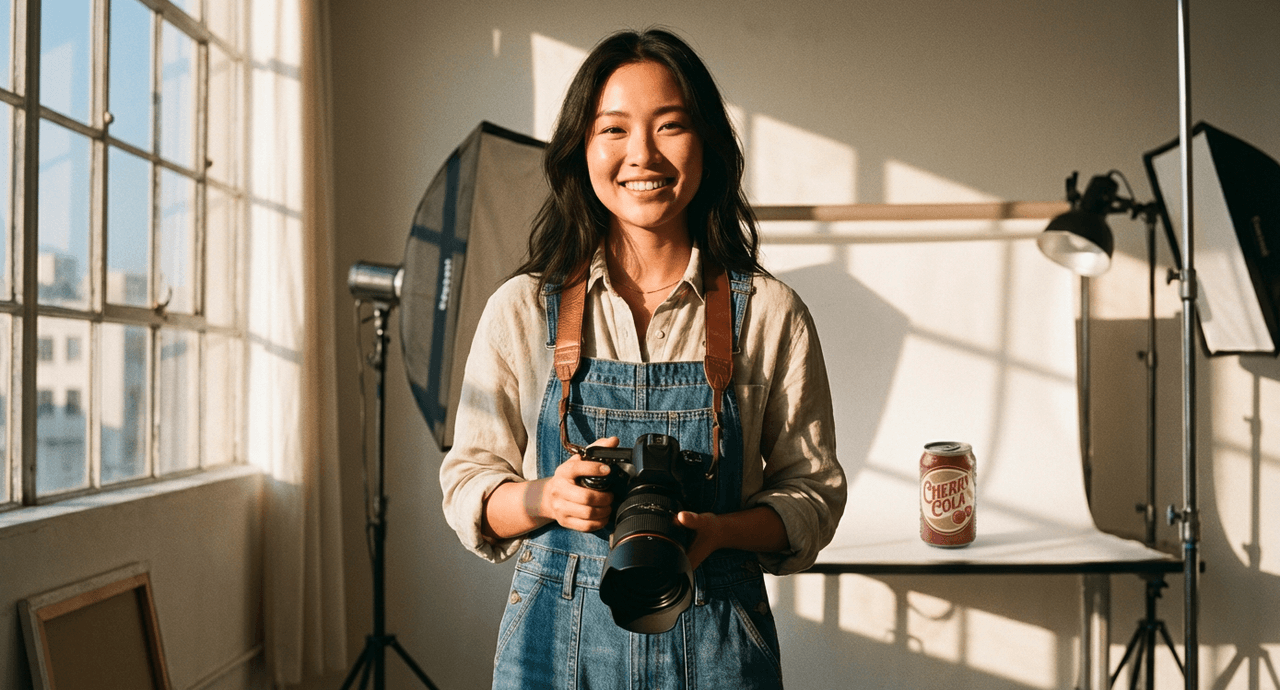
This single nano banana prompt consistently gives me clean, believable portraits with realistic skin instead of plastic gloss.
If you want more detail strategies grounded in real testing, this prompting guide is helpful.
Gallery & Examples — Copy-Paste Nano Banana Prompts for Instant Results
Let's turn the framework into prompts you can plug into Gemini 2.5 Flash Image (or a similar model) right now.
Workflow reminder:
-
Start from the 5-layer pattern.
-
Generate 4–8 images.
-
Tweak only one layer at a time (style, lighting, or composition) so you can see what's actually doing the work.
1. Product Shot with Sharp Text Label
Goal: social media product image with readable label text.
glass cold brew bottle, vanilla flavor, sharp label text,

product photography, clean e-commerce style,

soft studio light, bright white background,

close-up, eye-level, centered,

crisp reflections, subtle shadows under bottle
Tip: If the text is still off, I shorten it to 1–2 words and regenerate. Text rendering in diffusion models is improving fast but still imperfect: tight wording usually helps.
2. Hand + Phone for App or SaaS Landing Page
hand holding smartphone, open productivity app on screen,

cinematic photography, neutral color grading,

soft window light, office environment,

medium shot, slightly low angle, rule of thirds,

natural skin texture, shallow depth of field
For accurate UI previews, I recommend compositing real screenshots afterward in Figma or Photoshop. AI hands are better in 2025, but mission-critical UI still deserves manual control.
3. Lifestyle Portrait for Personal Branding
young Black woman, marketing strategist, friendly and confident,

editorial portrait photography, modern LinkedIn style,

soft window light, bright co-working space,

medium shot, eye-level, centered framing,

natural skin texture, subtle background blur
This has consistently given me portraits that feel approachable yet professional, perfect for banners, newsletters, or speaker cards.
4. Bold Thumbnail Background with Accurate Headline Text
handwritten neon sign, "Growth Lab" text in caps,

vector flat illustration, bold color blocks,

bright front lighting, dark navy background,

wide shot, centered composition,

clean edges, high contrast
If the model distorts the text, I regenerate 2–3 times, then keep the cleanest result as a background plate and overlay real type in my design tool.
5. Cinematic Scene for Storytelling Posts
man walking alone across rainy city street at night,

cinematic movie still, shallow depth of field,

moody streetlights, strong reflections on wet asphalt,

wide shot, eye-level, off-center framing,

raindrops visible, soft motion blur
I've used variations of this to create story covers and mood boards: changing only the subject and time of day retains the same overall filmic vibe.

Where This Workflow Fails (and What to Avoid)
Even though how effective nano banana prompts are, they're not magic.
This guide is NOT ideal if:
-
You need vector-perfect logos or brand marks (use Illustrator or Figma instead).
-
You require legal-grade product renders with exact packaging dimensions.
-
You want pixel-precise UI mocks or data charts.
For those cases, I treat AI outputs as concept art only, then rebuild the final asset manually.
Ethical Considerations for Nano Banana Prompting
As I lean more on AI-generated images, I try to stay transparent and responsible.
First, I clearly label AI content in client decks, posts, or ads, usually with a small caption like "Image generated with Gemini 2.5 Flash Image." It builds trust and avoids the awkward moment when someone assumes a real photoshoot happened.
Second, I watch for bias in subjects and styles. If I always prompt the same archetype (for example, only one skin tone for "professional"), the model will reinforce that. So I intentionally vary age, gender expression, and ethnicity across prompts and review outputs for stereotyping before publishing.
Third, on copyright and ownership: before echoing any named photographer or artist, I ask whether I'd be comfortable showing them the result. When in doubt, I use generic descriptors (like cinematic photography or editorial style) rather than referencing living artists. I also check the latest policy updates for my tool.
If you want to go deeper, I'd pair this nano banana prompt guide with a more technical breakdown of Gemini's image settings in this external Gemini 2.5 Flash Image Guide.
What has been your experience with nano banana-style prompts so far? Let me know in the comments.
Frequently Asked Questions
What is a nano banana prompt guide and who is it for?
A nano banana prompt guide is a framework for writing ultra-compact, layered prompts that still give AI image models everything they need: subject, style, lighting, composition, and detail. It’s ideal for creators who want fast, photorealistic, text-accurate images without writing long, complicated prompts.
How do I structure a nano banana prompt for best results?
The recommended nano banana prompt structure uses a 5-layer framework: 1) Subject, 2) Style, 3) Lighting, 4) Composition, and 5) Detail. Each “slice” is short and concrete, so you can swap or tweak one layer at a time while keeping prompts compact and outputs consistent.
Why does focusing on subject and lighting improve AI image quality?
Most failed images come from a vague subject and weak lighting cues. In this nano banana prompt guide, the subject is kept to one clear anchor with a simple modifier, and lighting is treated as its own layer. This helps the model lock onto what it’s drawing and how it’s lit, boosting realism and text accuracy.
Can I use nano banana prompts with AI models other than Gemini 2.5 Flash Image?
Yes. While this nano banana prompt guide is tested on Gemini 2.5 Flash Image, the 5-layer structure works with most diffusion-based image models (like DALL·E or Stable Diffusion). You may need minor tweaks to wording, but the principles around subject clarity, style caps, and lighting control still apply.
What are common mistakes to avoid when using nano banana prompts?
Common mistakes include stacking too many style adjectives, stuffing in conceptual phrases like “hyper-realistic 8K HDR,” and trying to get pixel-perfect logos or UI from pure AI. Keep descriptors short and physical, avoid artist name-dropping, and treat AI images as concept art when you need exact branding or interfaces.