Last Updated: December 08, 2025 | Tested Version: Z-Image-Turbo (Hugging Face, Nov 2025 snapshot)
AI tools evolve rapidly. Features described here are accurate as of December 2025.
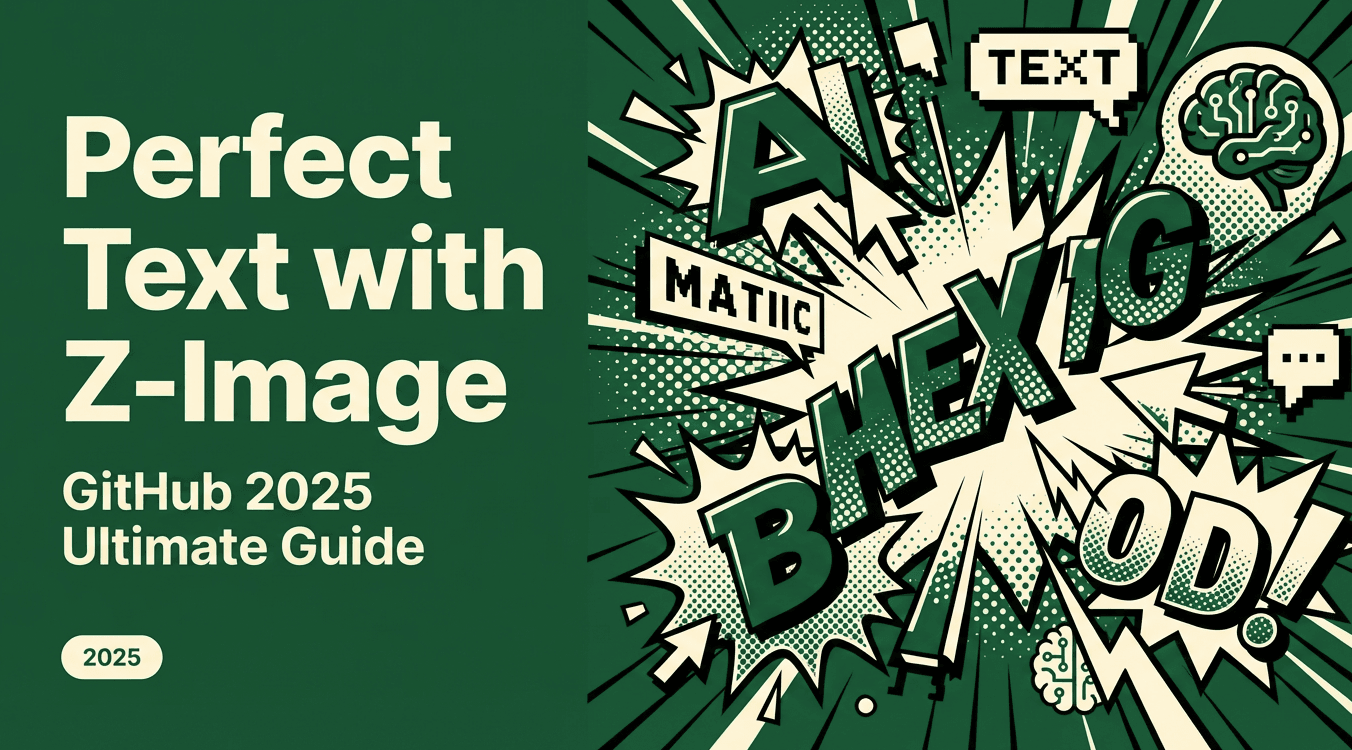
If you've ever wrestled with AI image tools that melt text, ignore layout, or take forever to render, Z-Image on GitHub is probably the repo you've been hoping for. I've spent time digging through the official Z-Image repository, installing it locally, and wiring it into my own workflows so you don't have to burn hours on trial and error.
In this guide, I'll walk you through what actually matters in the Z-Image GitHub project: the core architecture, which model variant to use, how to install it with Python and ComfyUI, how to pair it with Hugging Face Diffusers, and how to troubleshoot and contribute without getting lost in the weeds.
Deep Dive into the Z-Image Official Repository: Architecture & Features
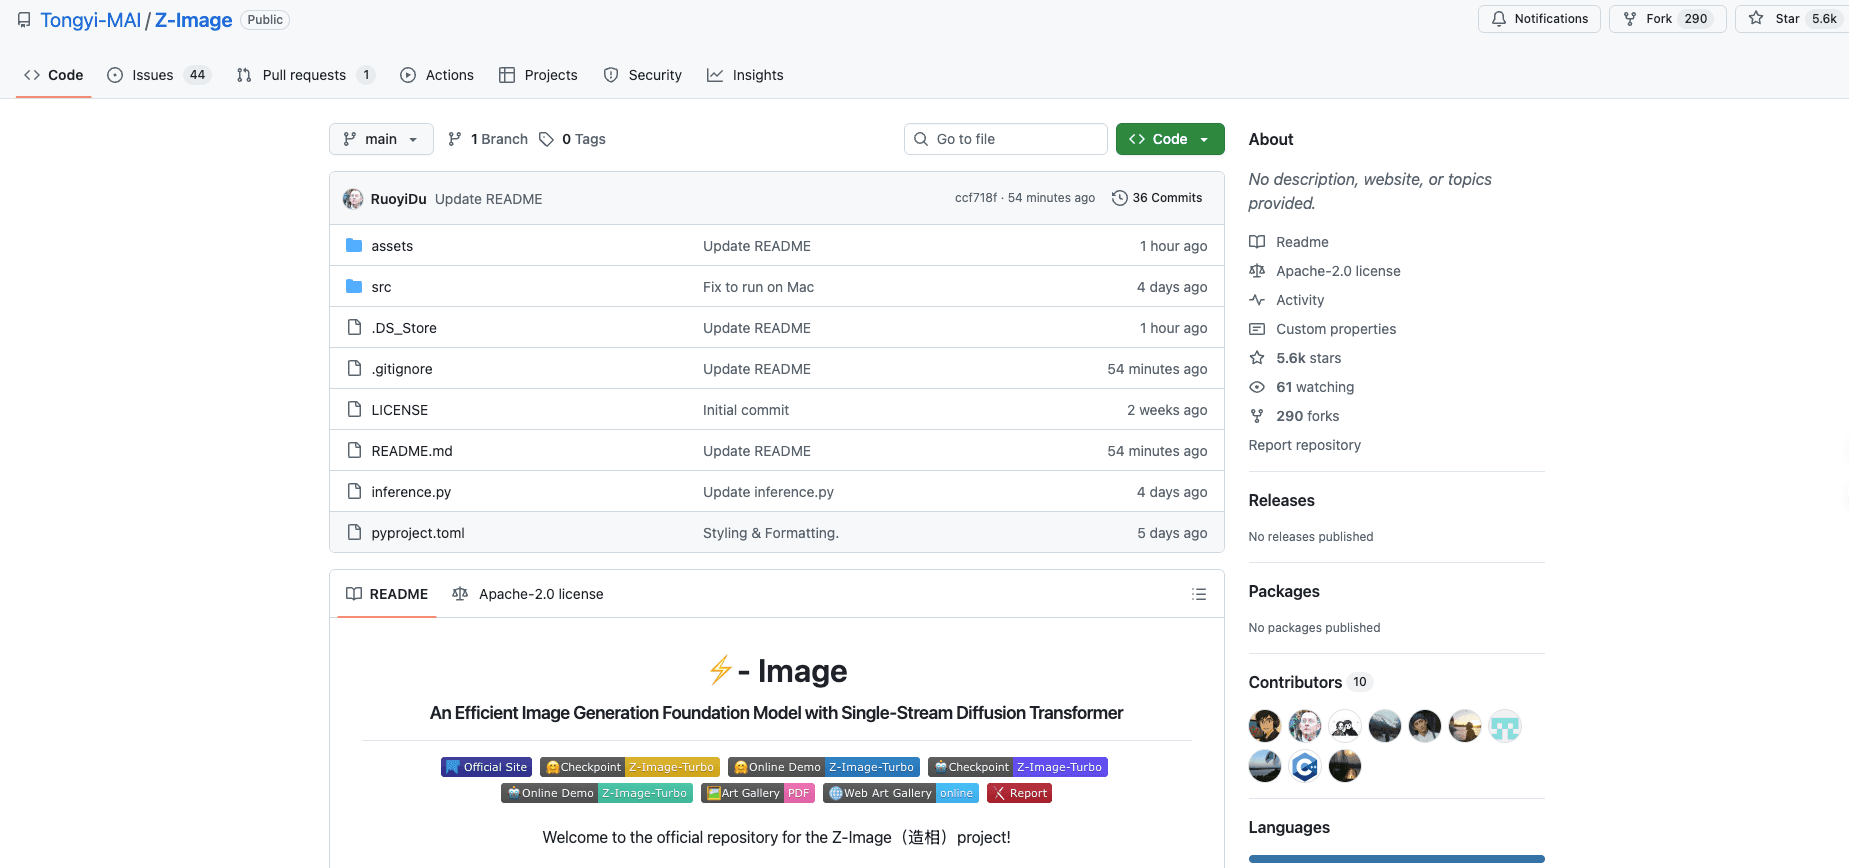
The official Z-Image GitHub repo is the control center for everything: core model code, config files, sample pipelines, and links to model weights on Hugging Face. If you're a creator or marketer, you don't have to read every line of code, but understanding the layout saves a lot of frustration.
Key folders and what they mean for you
Most Z-Image setups follow a structure similar to other diffusion pipelines:
-
configs/ – YAML or JSON configs defining model architecture, resolution, schedulers, and LoRA/text encoder settings. This is where you see how Z-Image gets such clean text: higher attention resolution around text regions and careful tokenizer handling.
-
models/ or checkpoints/ – Downloaded weights for Base, Turbo, and Edit models. If this folder is empty, nothing will run.
-
scripts/ – CLI entry points. Helpful if you want to batch-generate product shots, social posts, or A/B test thumbnails.
-
examples/ or notebooks/ – Minimal demos. I recommend starting here before you touch any custom settings.
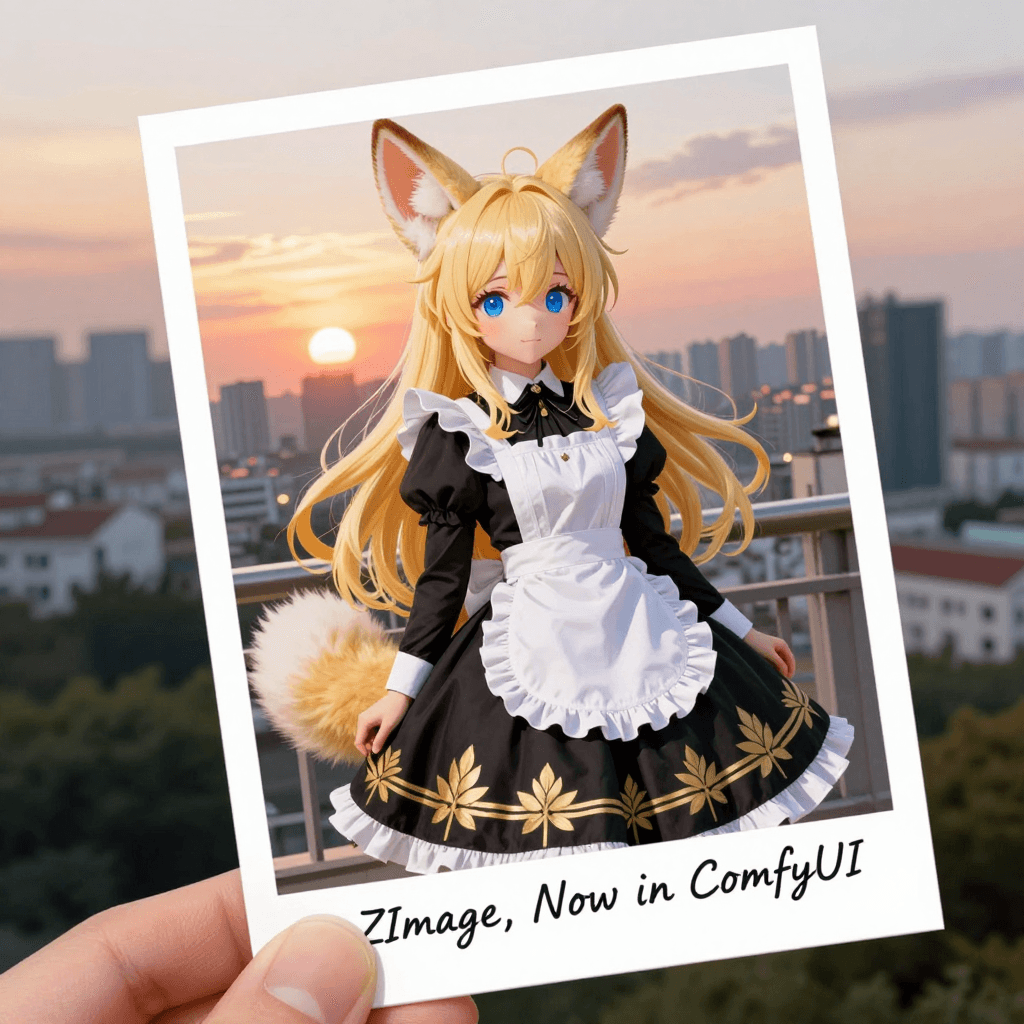
Z-Image follows a diffusion-based architecture, comparable to SDXL and Flux-family models, but tuned hard for text fidelity and composition control. According to the research paper, the model has been optimized specifically for maintaining text legibility. In my tests, a prompt like:
a flat-lay photo of a notebook labeled "CONTENT PLAN 2025" in bold sans-serif, on a wooden desk, natural window light
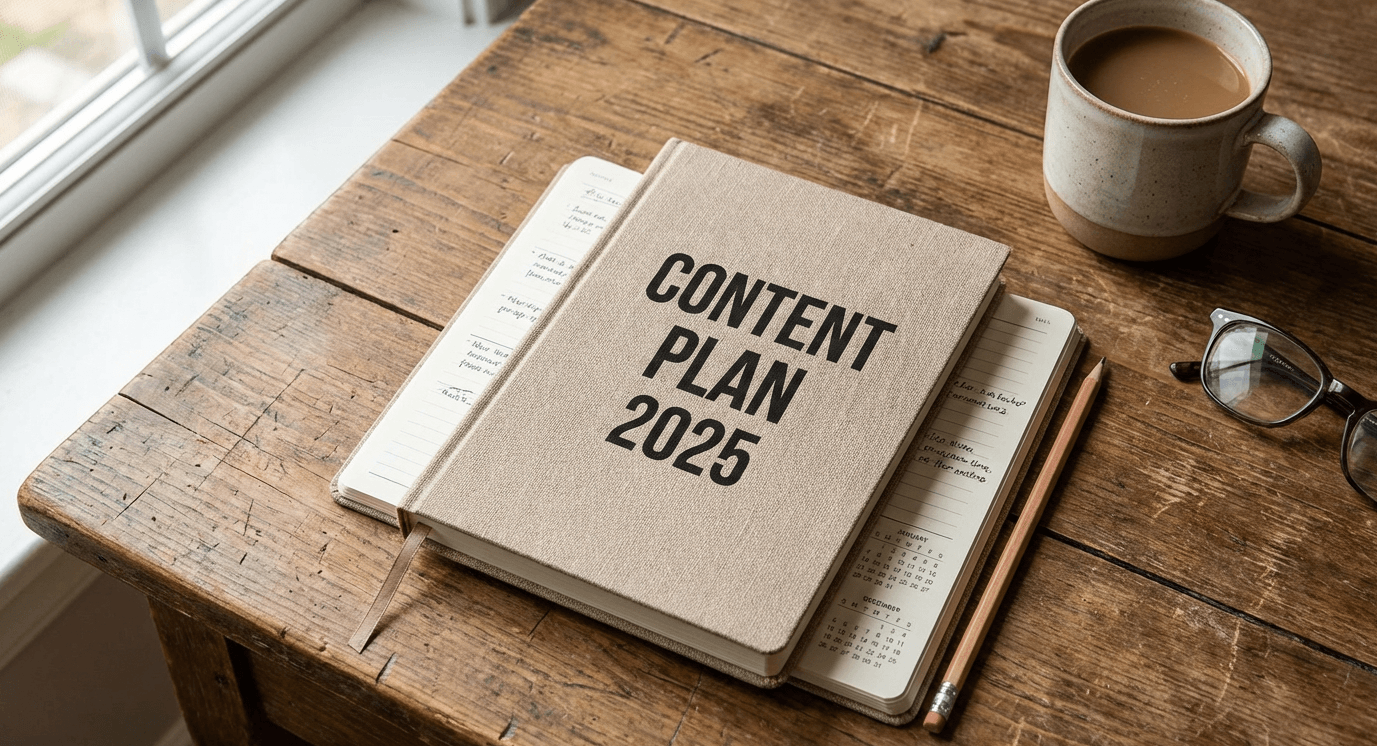
generated legible, sharp text at 1024×1024 on Turbo, with very little distortion. This is the detail that changes the outcome for social posts and ads where words on the image actually matter.
The repo's Issues and Discussions tabs are also worth bookmarking. I've seen fixes for broken installs, notes on driver compatibility, and example prompts from other creators that don't always make it into the docs.
Exploring the Model Zoo: Z-Image-Turbo, Base, and Edit Variants
Z-Image isn't a single model: it's a small ecosystem. Picking the right variant is the difference between "nice demo" and "production-ready asset."
Z-Image Base
-
Best for: High-quality stills, brand visuals, art-direction-heavy images.
-
Strengths: Stable style, excellent detail, predictable composition.
-
Trade-offs: Slower than Turbo. For large campaigns, renders can add up.
I use Base when I'm doing:
-
Hero images for landing pages
-
Key visuals where lighting and mood matter more than speed
Z-Image-Turbo
-
Best for: Rapid iteration, social media batches, thumbnail testing.
-
Strengths: Fast sampling, still strong text rendering at common resolutions.
-
Trade-offs: Slightly more artifacts at extreme resolutions or very dense text.
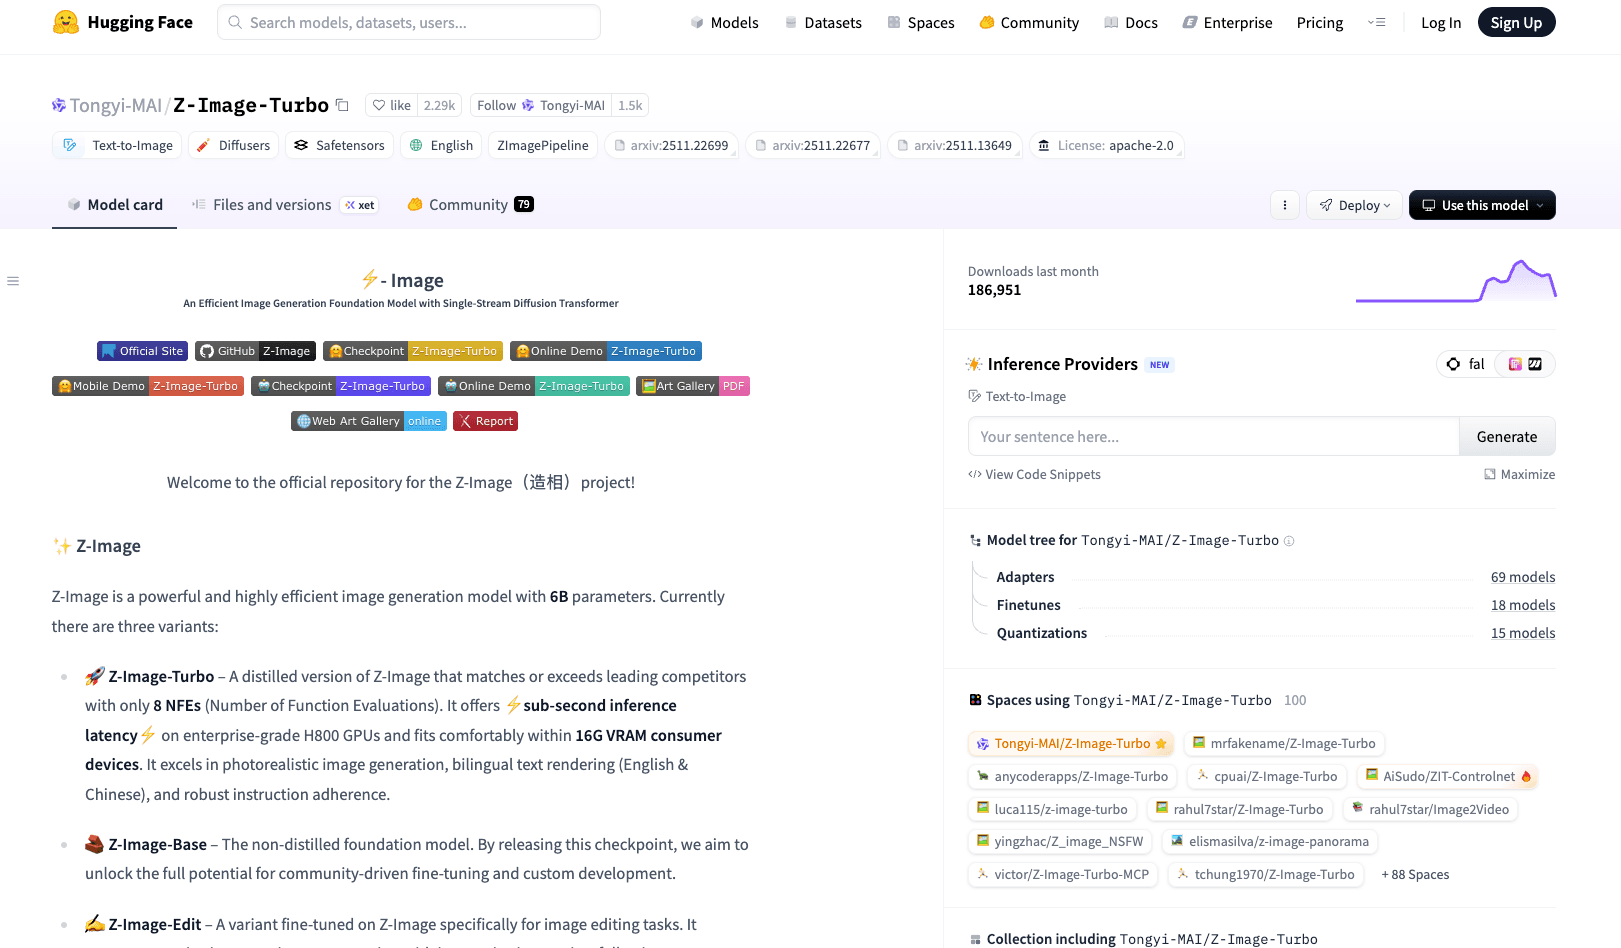
If you're A/B testing 20 variations of "Black Friday" banners, Turbo is the one to reach for. You can find the Z-Image-Turbo model on Hugging Face with detailed specifications and download instructions.
Z-Image Edit (inpainting/variants)
-
Best for: Fixing details, changing text on a sign, updating packaging copy, localized versions.
-
Strengths: Local edits without destroying the rest of the frame.
-
Trade-offs: Requires a clean mask and reasonably similar style to the source.
A typical workflow I rely on:
-
Generate a clean scene with Base.
-
Switch to Edit to update text: e.g., change "SUMMER SALE" to "WINTER SALE" in multiple languages.
For a more technical comparison of speeds and sampler settings, check the benchmarking notes on the **Z-Image-Turbo Hugging Face model card **and any performance tables linked in the repo's README.
Step-by-Step Local Installation Guide (Python & ComfyUI)
If you're overwhelmed by manual installs, here's the leanest route I've found to get Z-Image running locally with Python and ComfyUI.
Prerequisites
-
A recent GPU driver (NVIDIA CUDA 12.x recommended)
-
Python 3.10+
-
Git
-
Basic familiarity with virtual environments
1. Clone the Z-Image GitHub repo
Open your terminal and run:
git clone https://github.com/Tongyi-MAI/Z-Image.git
cd Z-Image
2. Create and activate a virtual environment
On most systems:
python -m venv .venv
source .venv/bin/activate # Windows: .venv\Scripts\activate
3. Install Python dependencies
Use the repo's requirements file:
pip install -r requirements.txtIf you see GPU-related errors, confirm your PyTorch install matches your CUDA version.
4. Download model weights
From the README or Hugging Face card, copy the model name (for example):
python scripts/download_weights.py \
--model_name "Tongyi-MAI/Z-Image-Turbo" \
--output_dir "models/z_image_turbo"
(If no script exists, the README usually gives you a git lfs or huggingface-cli command.)
5. Connect Z-Image to ComfyUI
Assuming you already have ComfyUI installed, you can follow the ComfyUI Z-Image examples for detailed setup instructions:
-
Copy the Z-Image custom nodes from the repo (or the ComfyUI examples page) into your ComfyUI custom_nodes/ directory.
-
Place downloaded checkpoints into ComfyUI's models folder, or point the node to your Z-Image models/ path.
-
Restart ComfyUI and look for nodes labeled Z-Image, Z-Image Turbo, or similar.
Now you can drag a Z-Image node into your ComfyUI workflow, wire in Prompt, Negative Prompt, and Sampler nodes, and start testing.
Example sampler parameters I like for Turbo:
-
steps: 18-22
-
cfg_scale: 5.5-7.0
-
resolution: 1024x1024
-
scheduler: dpm++ 2m or similar
Developers' Corner: Integrating Z-Image with Hugging Face Diffusers
If you're more comfortable in Python scripts than in GUIs, the Diffusers integration is where Z-Image becomes a flexible building block.
Basic Diffusers setup
Assuming Z-Image exposes a pipeline compatible with Diffusers (as described in the official Diffusers documentation):
pip install diffusers transformers accelerate safetensorsThen, in Python:
from diffusers import ZImagePipeline
import torch

pipe = ZImagePipeline.from_pretrained(
    "Tongyi-MAI/Z-Image-Turbo",
    torch_dtype=torch.float16
).to("cuda")

prompt = "high-key studio photo of a coffee cup with the text 'Q4 REPORT' on the mug, 4k, product shot"

image = pipe(
    prompt=prompt,
    num_inference_steps=20,
    guidance_scale=6.5,
    height=1024,
    width=1024,
).images[0]

image.save("q4_report.png")
When I run something like this, I look closely at the sharpness and spacing of the text. Compared to generic SDXL, Z-Image tends to preserve letterforms better, especially at banner-like aspect ratios.
Batch generation for campaigns
For marketers and designers, the real value comes from automating variations:
-
Loop over headlines (e.g., "Holiday Sale", "Year-End Deals", "Members Only").
-
Loop over background moods (e.g., warm cozy light vs. minimal monochrome).
-
Keep camera and layout steady while changing copy and color accents.
That gives you a whole ad set from a single script, ready for manual pruning and final polish.
For deeper customization (custom schedulers, LoRAs, or mixed pipelines), you can benchmark Z-Image like any other Diffusers model by logging latency, VRAM usage, and text accuracy on your own prompts.
Troubleshooting & Contributing to the Open Source Project
Even solid repos have sharp edges. Here's how I deal with the most common Z-Image GitHub pain points, and how you can give back when you've stabilized your setup.
Common issues and quick checks
CUDA / GPU errors:
-
Confirm torch.cuda.is_available() returns True in a Python shell.
-
Match PyTorch + CUDA versions per the official matrix.
Weird, unreadable text:
-
Increase resolution to at least 768×768, ideally 1024×1024.
-
Use shorter, clearer prompts and keep on-image text under ~6–8 words if possible.
Outputs look nothing like the prompt:
-
Gradually raise guidance_scale from 4.5 up to about 7.5.
-
Check that you're not loading a mismatched checkpoint (Turbo vs Base) in your pipeline.
Where Z-Image currently struggles, in my experience:
-
Extremely dense typography (posters covered in tiny text)
-
Vector-perfect logos or brand icons
If you need pixel-perfect logo work, I'd still finish in something like Illustrator or Figma and treat Z-Image as your layout and mood generator.
How to contribute without being "that" issue-opener
Before filing an issue on the Z-Image GitHub repository:
-
Search existing Issues and Discussions.
-
Include:
-
OS, GPU, driver version
-
Exact command or script
-
A minimal prompt that reproduces the problem
If you're ready to contribute code:
-
Fork the repo.
-
Create a feature branch.
-
Follow any CONTRIBUTING.md guidelines (coding style, tests, etc.).
-
Open a Pull Request with:
-
Clear description
-
Before/after examples (images, logs, or both)
Maintainers are far more likely to review a PR that includes test coverage and minimal, focused changes.
Ethical considerations when using Z-Image
As powerful as Z-Image is for creators, there are a few 2025 realities worth keeping in mind:
Transparency: When I use Z-Image outputs in client work or public content, I clearly label them as AI-assisted or AI-generated. It avoids confusion and sets realistic expectations about editability and licensing.
Bias mitigation: Diffusion models can reproduce biases present in their training data, stereotypical roles, skewed demographics, and more. I routinely test prompts with different genders, ages, and ethnicities to see how the model responds, then adjust prompts or post-process images to avoid reinforcing those patterns.
Copyright and ownership: Laws are still evolving, but I treat Z-Image outputs like stock assets with caveats. I avoid directly mimicking living artists' names, famous characters, or trademarked logos in prompts. When a brand is involved, I keep logos as vector overlays created in design tools, composited on top of Z-Image renders.
If you're building workflows around Z-Image, it's also worth documenting internally which steps are AI-generated for future audits or client questions.
What has been your experience with the Z-Image GitHub repo so far? Let me know in the comments.
Z-Image GitHub – Frequently Asked Questions
What is Z-Image GitHub and how is it different from other AI image generators?
The Z-Image GitHub repository hosts a diffusion-based image model tuned specifically for sharp, readable text and strong composition control. Compared to generic SDXL-style models, it focuses on text fidelity, layout stability, and production-ready assets, making it ideal for ads, social posts, and marketing visuals where on-image wording really matters.
Which Z-Image model variant should I choose for my project?
Use Z-Image Base for high-quality hero images and brand visuals where mood and detail matter more than speed. Choose Z-Image-Turbo for rapid iteration, social media batches, and thumbnail A/B tests. Switch to Z-Image Edit when you need inpainting or localized changes, such as updating text on signs or packaging while preserving the scene.
How do I install Z-Image from GitHub and run it locally?
Clone the Z-Image GitHub repo, create and activate a Python virtual environment, then install dependencies with pip using requirements.txt. Next, download the model weights from Hugging Face or the README instructions, place them in the models/checkpoints folder, and optionally connect Z-Image to ComfyUI or Hugging Face Diffusers for your preferred workflow.
Can I integrate Z-Image with Hugging Face Diffusers for scripted workflows?
Yes. After installing diffusers, transformers, accelerate, and safetensors, you can load a pipeline such as Z-Image-Turbo via ZImagePipeline.from_pretrained(...) as documented in the Diffusers API reference. From there, you script prompts, guidance_scale, resolution, and batch loops to generate entire campaign sets, while monitoring factors like latency, VRAM usage, and text accuracy in your own environment.
Is Z-Image free to use and what should I know about licensing and ethics?
Z-Image is available through its open-source GitHub project, but you should always check the repository's LICENSE file and Hugging Face model card for commercial-use terms. Ethically, clearly label AI-generated content, avoid mimicking specific artists or trademarks, and evaluate outputs for potential bias in demographics or stereotypes before using them in public-facing work.